
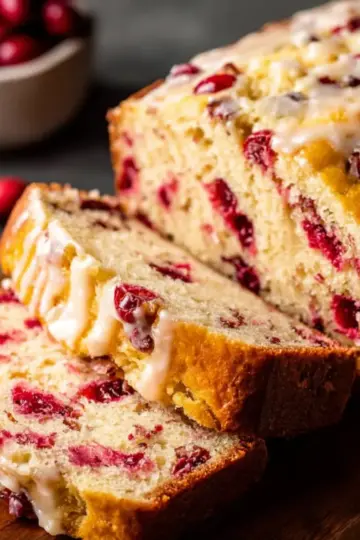
Introduction to Homemade Apple Crisp
Why Apple Crisp is a Timeless Favorite
If you're searching for the perfect dessert that combines warmth, texture, and sweetness, look no further than homemade apple crisp. This classic dish has an irresistible combination of tender baked apples and a crunchy, buttery topping that’s sure to evoke nostalgic memories of family gatherings or cozy autumn evenings.
One of the great things about apple crisp is its versatility. You can use a variety of apples depending on your taste; Honeycrisp apples work wonderfully for their balance of sweetness and tartness. In fact, according to an article by the United States Apple Association, there are over 7,500 varieties of apples, which means you can always experiment and make this dish uniquely yours.
Apple crisp isn’t just delicious, it’s also incredibly easy to make. With simple ingredients often found in your pantry, it’s a dish that jumps together quickly, whether you want to bake it as a comforting weeknight treat or an impressive dessert for guests. Just imagine serving it warm, topped with a scoop of vanilla ice cream—what’s not to love?
Ready to dive into a scratch-made apple crisp recipe that will wow your taste buds? Let’s get started!
Ingredients for Homemade Apple Crisp
Essential Ingredients for the Apple Filling
To create a delectable homemade apple crisp, you'll need a delightful blend of flavors to make the apple filling. Here are what you’ll need:
- 4 cups sliced unpeeled Honeycrisp apples (about ¼″ thick)
- 2 teaspoons lemon juice for that zesty brightness
- ¾ cup granulated sugar to bring in sweetness
- 4 tablespoons flour for thickening
- 1 teaspoon cinnamon to enhance warmth and spice
- 2 teaspoons vanilla extract for a hint of flavor perfection
- A few pinches of Kosher salt to balance the sweetness
Don’t hesitate to mix and match apple varieties! Mixing tart and sweet apples can add an exciting depth that will keep your guests guessing.
Ingredients for the Crisp Topping
The topping is what makes homemade apple crisp truly irresistible. Follow this easy list to get the right crunch:
- ½ cup flour for structure
- ½ cup old-fashioned rolled oats for that chewy texture
- ½ cup brown sugar to add a rich caramel flavor
- ½ teaspoon cinnamon to repeat that lovely spice
- 6 tablespoons cold butter, cubed for a flaky melt-in-your-mouth experience
- A large pinch of Kosher salt to round out the flavors
The magic happens when these ingredients combine! The crisp topping should be well mixed until it resembles a coarse meal, ensuring every bite offers a perfect crunch alongside that sweet apple filling.
Ready to dive into your baking adventure? Check out this resource for tips on choosing the best apples and maximizing flavor!
Preparing Homemade Apple Crisp
Making homemade apple crisp is one of those delightful kitchen experiences that can transform a few simple ingredients into a heartwarming dessert. It’s easy, fun, and a crowd-pleaser—perfect for a cozy gathering or a weeknight treat. Let’s dive into the steps so you can create your very own apple crisp!
Prepping the Oven and Skillet
First things first, let’s get your oven preheating to 375°F. This temperature allows the apples to cook just right, making them fork-tender without turning mushy. While the oven warms up, grab your 9-inch cast iron skillet and lightly grease it. Using a cast iron skillet adds that professional touch, giving your homemade apple crisp a beautiful baked crust.
Making the Apple Filling
Now, let’s craft that delicious apple filling. In a large bowl, combine:
- 4 cups of sliced unpeeled Honeycrisp apples (make sure they're about ¼ inch thick for optimal cooking)
- 2 teaspoons of lemon juice (this keeps the apples from browning)
- ¾ cup of granulated sugar
- 4 tablespoons of flour
- 1 teaspoon of cinnamon
- 2 teaspoons of vanilla extract
- A few pinches of kosher salt
Gently toss all the ingredients together with your hands, ensuring every apple slice is evenly coated. This step is crucial, as it enhances the flavor of the apples and ensures they cook beautifully.
Preparing the Crisp Topping
Time for the crispy goodness! In another medium bowl, mix together the following ingredients for your topping:
- ½ cup of flour
- ½ cup of old-fashioned rolled oats
- ½ cup of brown sugar
- ½ teaspoon of cinnamon
- 6 tablespoons of cold butter, cubed
- A large pinch of kosher salt
Using your hands, a fork, or a pastry cutter, combine these ingredients until the mixture resembles pea-sized crumbs. This texture is key for that coveted crispiness!
Combining Filling and Topping
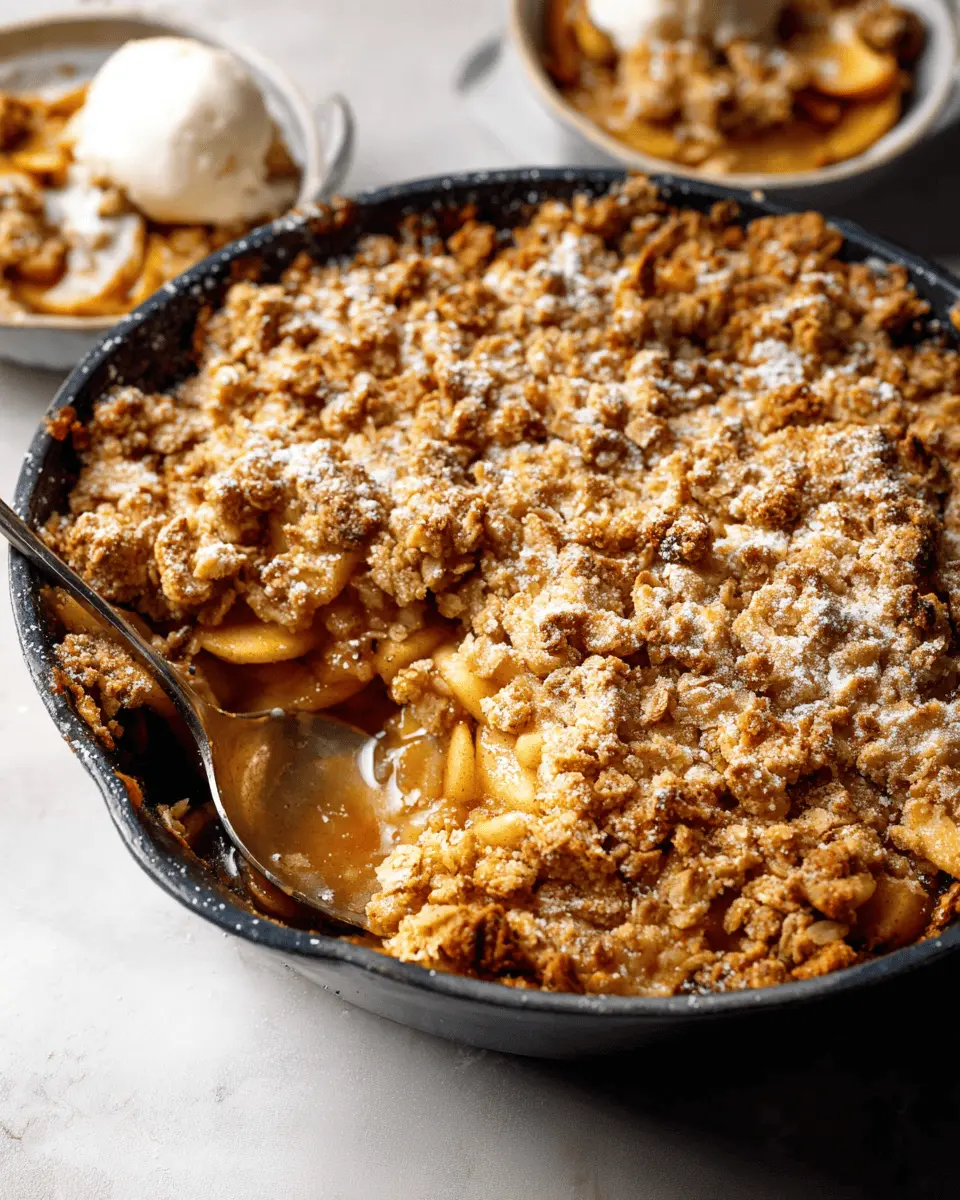
With both components ready, it's time for assembly. Pour the apple filling into your greased skillet, and spread it evenly. Then, generously sprinkle your crisp topping over the apples, making sure you cover them completely. The result should look deliciously inviting!
Bake to Perfection
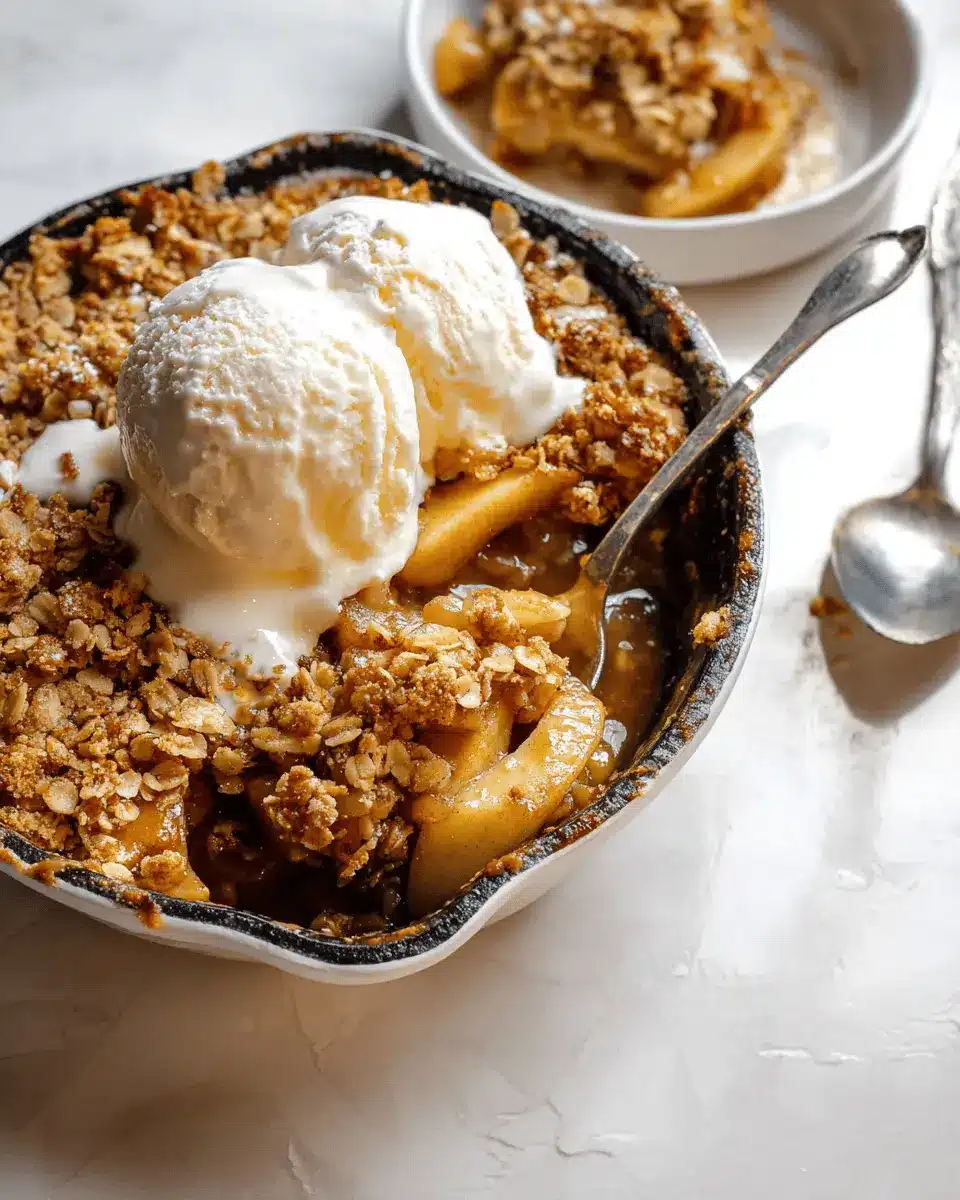
Finally, pop your skillet into the preheated oven, baking for about 30 minutes. Keep an eye on it! You want the apples to be tender and the topping a beautiful golden brown. A well-baked homemade apple crisp will fill your kitchen with an irresistible aroma that’s sure to have everyone eagerly awaiting their first bite.
And there you have it! You’ve successfully made a delicious homemade apple crisp. Serve it warm with a scoop of vanilla ice cream and enjoy the joyous smiles it brings to your friends and family. Happy baking!
Variations on Homemade Apple Crisp
Gluten-Free Apple Crisp
Creating a delicious gluten-free homemade apple crisp is simpler than you might think! Just substitute regular flour with certified gluten-free options like almond or coconut flour. You can also amp up the flavor by adding walnuts or pecans to the oat topping. If you prefer a little extra sweetness, try drizzling in some maple syrup or honey at the end.
Vegan Apple Crisp Options
No butter? No problem! For a vegan homemade apple crisp, swap out the butter for coconut oil or dairy-free margarine in equal parts. Additionally, to kick the sweetness up a notch without using honey, opt for agave syrup or pure maple syrup instead. This way, you can indulge in a warm, comforting dessert that's both plant-based and utterly satisfying.
Feel free to mix and match these variations to discover your own perfect homemade apple crisp! For more insights on healthy baking, check out resources from the American Heart Association or Serious Eats.
Cooking Tips and Notes for Homemade Apple Crisp
Ensure the Right Apple Texture
When making homemade apple crisp, the key is selecting apples that maintain a slight firmness even after baking. You want those slices to be fork-tender but not mushy. Honeycrisp and Granny Smith apples offer the perfect balance of sweetness and tartness while holding up well in the oven, adding a delightful flavor complexity to your dish.
Optimal Crisp Topping Consistency
For that ideal topping, aim for a mix that resembles coarse crumbs. Make sure the butter is cold and cubed; this will help create that irresistible crispy layer on top. Use your fingers or a pastry cutter to ensure a light touch, allowing chunks of butter to remain for maximum crispiness. Keep an eye on it while baking—golden brown is the goal!
For more apple crisp inspiration, check out resources from America’s Test Kitchen for their excellent baking tips!
Serving Suggestions for Homemade Apple Crisp
Serving with Ice Cream
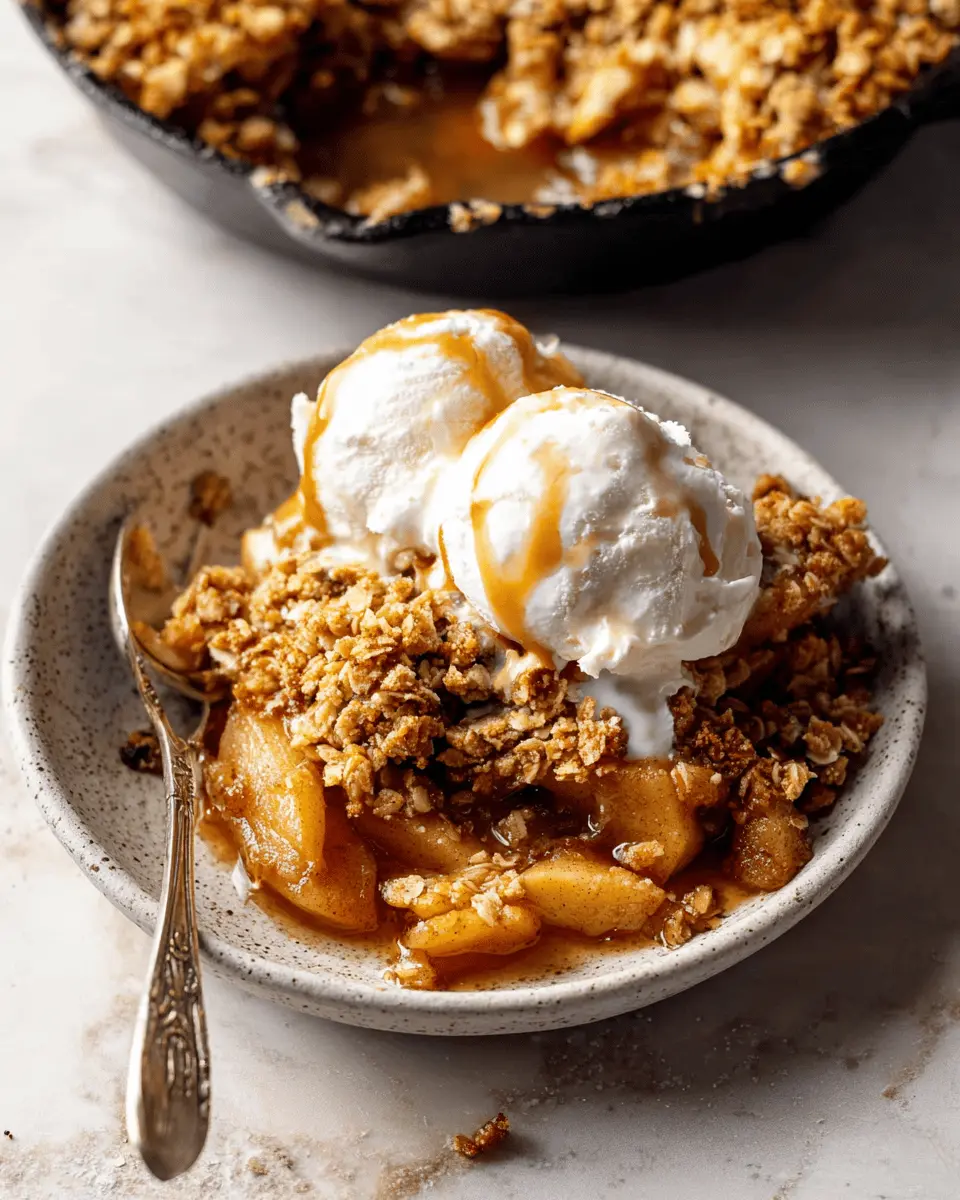
Nothing elevates your homemade apple crisp quite like a scoop of cold, creamy vanilla ice cream. The contrast between the warm, spiced apples and the cool smoothness of the ice cream creates a delightful balance. Just imagine taking a spoonful with both toppings — pure bliss! For an extra twist, consider a sprinkle of cinnamon or even a drizzle of caramel sauce on top.
Pairing with Whipped Cream
If ice cream isn't your style, fluffy whipped cream is another delicious partner for your apple crisp. Light and airy, it complements the crisp topping beautifully without overpowering the warm apple flavor. You might even try making your own whipped cream at home with just heavy cream and a touch of sugar for that fresh taste!
For more serving ideas and dessert inspirations, check out websites like Serious Eats and Bon Appétit for creativity!
Time Breakdown for Homemade Apple Crisp
Preparation Time
Gather your ingredients and tools—this step takes about 15 minutes. Peel and slice those glorious Honeycrisp apples, mix them with the perfect blend of sugar and spices, and get those hands ready to work on the tasty topping!
Baking Time
Once everything’s prepped, pop your homemade apple crisp in the oven! Baking will take around 30 minutes. You’ll love the aroma wafting through your kitchen as it transforms into a deliciously golden masterpiece.
Total Time
Altogether, expect the entire process to take about 45 minutes. A small investment of time for a delightful dessert that can elevate any dinner gathering or cozy night in!
Looking for a fantastic side to complement this treat? Check out this article on apple varieties to discover the best options that’ll enhance your homemade apple crisp!
Nutritional Facts for Homemade Apple Crisp
Calories per Serving
If you’re wondering about caloric intake, each serving of this delightful homemade apple crisp contains approximately 299 calories. This makes it a heartwarming yet moderate dessert option, perfect for indulging without the guilt.
Breakdown of Sugar and Fiber
When it comes to nutrition, this crisp strikes a balance. Each serving features 37.5 grams of sugar, drawing primarily from the natural sweetness of the apples and added sugars. You’ll also benefit from 2.7 grams of fiber, contributing toward your daily intake and promoting digestive health. For a deeper dive into nutritional values, check out Healthline's fiber articles.
Enjoy your homemade apple crisp guilt-free, knowing it’s both a treat and a source of essential nutrients!
FAQs about Homemade Apple Crisp
What's the best type of apples to use?
When making homemade apple crisp, the choice of apples can significantly affect the flavor and texture of your dish. Ideal varieties include Honeycrisp for their sweetness and crispness, Granny Smith for a tart contrast, or Fuji for a balance of sweetness and firmness. Mixing a couple of varieties can create a more complex flavor profile!
How can I store leftovers?
To keep your homemade apple crisp fresh, store it in an airtight container at room temperature for up to 3 days. If you want to enjoy it longer, consider refrigerating it for up to a week. For best results when reheating, place it back in the oven for a few minutes to restore some of that delightful crunch.
Can I make it ahead of time?
Absolutely! Preparing your apple crisp a day in advance is a great way to save time. Just store the assembled dish in the refrigerator and bake it when you’re ready to serve. This also allows the flavors to meld, enhancing the overall taste of your crisp!
Conclusion on Homemade Apple Crisp
Why You Should Make Homemade Apple Crisp Today!
Bringing the warmth and comfort of your kitchen to life is simple with a delicious homemade apple crisp. This nostalgic dessert not only tantalizes your taste buds but also creates a lovely experience perfect for gatherings or a cozy night in. Don't wait—grab some apples and start baking today!
The combination of sweet, juicy apples and a crispy topping is a heavenly match, especially when served warm with a scoop of ice cream. Trust me, a homemade apple crisp is bound to impress your friends and family. Check out more apple dessert ideas and make your evenings a little sweeter!

Homemade Apple Crisp: A Cozy, Indulgent Dessert to Savor
Equipment
- large cast iron skillet
Ingredients
For the apple filling
- 4 cups sliced unpeeled Honeycrisp apples ¼" thick slices
- 2 teaspoons lemon juice
- ¾ cup granulated sugar
- 4 tablespoons flour
- 1 teaspoon cinnamon
- 2 teaspoons vanilla extract
- Kosher salt a few pinches
For the crisp topping
- ½ cup flour
- ½ cup old fashioned rolled oats
- ½ cup brown sugar
- ½ teaspoon cinnamon
- 6 tablespoons cold butter cubed
- Kosher salt large pinch
Instructions
Instructions
- Heat oven to 375 degrees and lightly grease 9" cast iron skillet.
- Add apples, lemon juice, sugar, flour, cinnamon, vanilla, and salt to a large bowl.
- Toss gently with your hands to coat the apples evenly in the mixture.
- Dump apples into the greased baking dish.
- Add flour, oats, brown sugar, cinnamon, cubed butter, and salt to a medium bowl.
- Use your hands, a fork, or a pastry cutter to combine ingredients and gently break butter up into pea-size pieces as you mix everything together.
- Spread topping in an even layer across the apples.
- Bake for 30 minutes or until the apples are fork-tender and the crisp is a dark golden brown. Serve with vanilla ice cream and enjoy!


Leave a Reply