
Introduction to Crème Brûlée
Crème brûlée is more than just a classic French dessert; it’s a culinary experience that transforms any meal into something truly special. For young professionals navigating the fast-paced world, learning how to make this indulgent dish can be a magnificent game changer. Imagine wrapping up a hectic workweek with a homemade dessert that impresses friends and family alike. Plus, it allows you to showcase your cooking skills without spending hours in the kitchen.
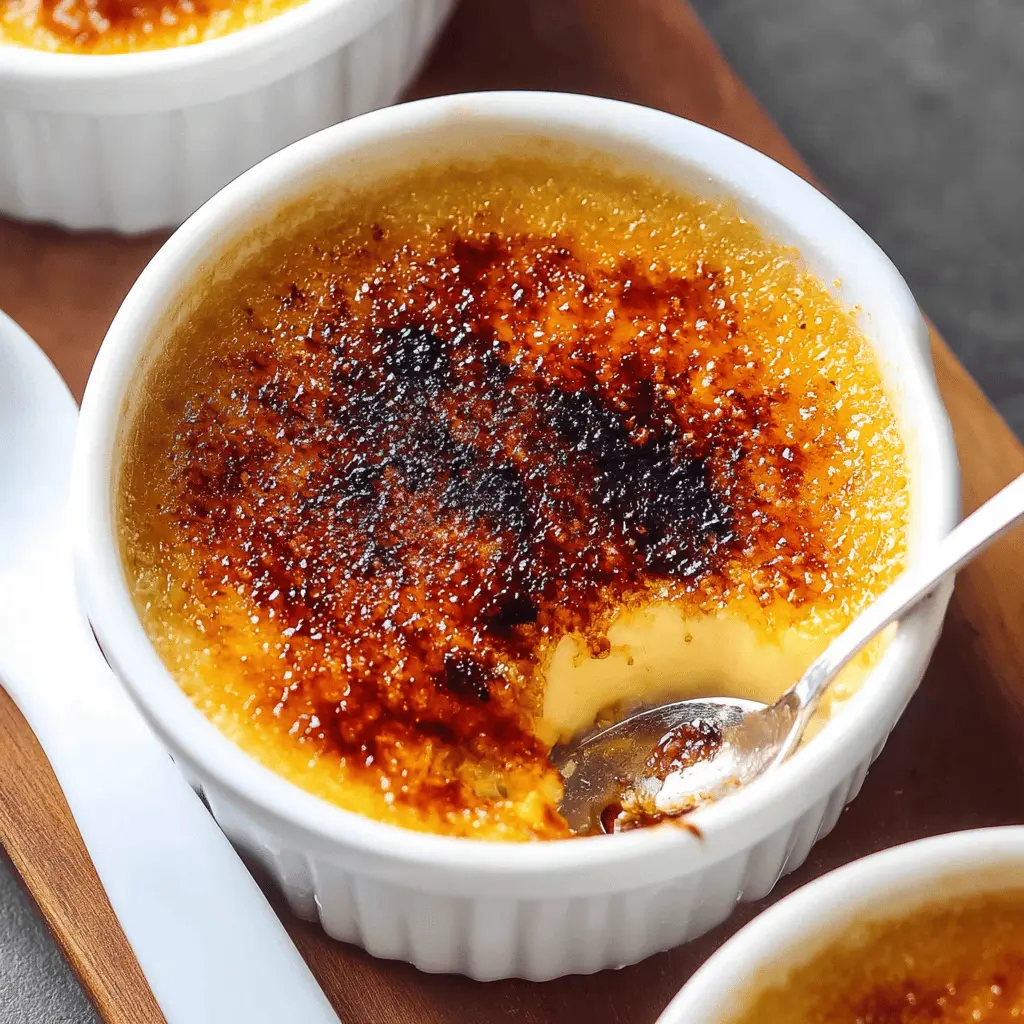
Homemade crème brûlée is surprisingly easy to prepare and doesn't require any fancy equipment beyond a few ramekins and a kitchen torch. The creamy vanilla custard paired with that signature crispy caramelized sugar topping is a delightful treat for the senses, blending textures and flavors in every bite.
Moreover, investing time in such recipes can be a fantastic way to unwind. As noted by various culinary experts, engaging in cooking can serve as a therapeutic outlet, providing a much-needed break from daily routines. Why not dive into this sophisticated yet approachable dessert? Check out Gastronomica or the Food Network for tips and tricks from seasoned chefs!
Embrace the joy of crafting your very own crème brûlée and elevate your dessert game.

Ingredients for Crème Brûlée
Essential Ingredients for the Perfect Crème Brûlée
To create an indulgent crème brûlée, you need just a handful of essential ingredients that work together to create that rich, velvety texture and delightful caramelized topping:
- 1 vanilla bean: This is the star of the show, providing depth and a natural sweetness.
- 1 ¾ cups heavy cream: Its richness is crucial for that luscious custard base.
- 5 large egg yolks: These give the créme brûlée its creamy texture and depth.
- ½ cup granulated sugar: Sweetness is key, but it also helps to caramelize the topping.
- 4 teaspoons granulated sugar (for topping): This sugars forms the crispy layer that contrasts beautifully with the smooth custard.
These simple ingredients are easily accessible, making it a delightful treat to whip up at home.
Alternative Ingredients for Dietary Preferences
Not everyone can indulge in traditional crème brûlée, but there are alternatives that still offer a delightful dessert experience! Here are a few substitutes you might consider:
- Dairy-free milk: Swap heavy cream with coconut cream or almond milk for a lighter version.
- Egg alternatives: You can use a commercial egg replacer or aquafaba for a vegan twist.
- Natural sweeteners: Experiment with maple syrup or honey for a different flavor profile without refined sugar.
Feel free to explore these variations, and you’ll still end up with a dessert that feels special! For more fun vegan dessert ideas, check out Minimalist Baker.
Preparing Crème Brûlée
Making a classic crème brûlée is not only about following a recipe but also about enjoying the process. Each step allows you to hone your culinary skills while creating a dessert that’s sure to wow your friends and family. Let’s walk through the essentials of preparing this delicious custard step by step.
Gather Your Ingredients and Tools
Before diving in, it’s essential to have everything you need within reach. For this easy crème brûlée, you will need:
- 1 vanilla bean
- 1 ¾ cups heavy cream
- 5 large egg yolks
- ½ cup granulated sugar (plus extra for topping)
- 4 cups water
- Ramekins (4 x 4-ounce)
- A medium saucepan, whisk, and a fine-mesh sieve
Having these ingredients and tools prepared will make the process smoother, allowing you to concentrate on creating that silky, creamy custard.
Extract the Vanilla Seeds
The heart of a great crème brûlée is its flavor, and it all begins with the vanilla. Cut your vanilla bean in half lengthwise, and with the back of a paring knife, scrape the seeds from the inside. This fragrant paste will elevate your dessert’s taste and aroma. For an alternative, you could use high-quality vanilla extract, but nothing quite compares to fresh vanilla beans.
Scald the Heavy Cream
Next, in a medium saucepan, combine the heavy cream, the vanilla bean seeds, and the whole pod. Heat the mixture on medium-low until it reaches 180ºF (82ºC). Stir occasionally to prevent scorching. Once you've achieved that temperature, remove it from the heat and let the vanilla infuse for about five minutes. This step is crucial as it infuses the cream with deep, rich flavors, creating a base for your custard.
Combine Egg Yolks and Sugar
While the cream infuses, separate your egg yolks and whisk them gently in a medium bowl along with the granulated sugar. This mixture should be well combined; whisk just enough to dissolve the sugar without incorporating too much air to keep your custard creamy and smooth.
Strain the Cream Mixture
After the cream has infused, it’s time to strain it. Position a fine-mesh sieve over a medium bowl and pour the cream mixture through it. This will remove the vanilla pod while allowing the tiny seeds to enrich your custard.
Temper the Eggs Carefully
To make sure your egg yolks don’t scramble when combined with the hot cream, you’ll need to temper them. Gradually add about ⅓ cup of the warm cream mixture into the egg yolks while whisking continuously. Repeat this two more times to raise the temperature of the yolks gently, and then mix the yolk and cream mixtures back together.
Prepare the Water Bath
Fill a medium saucepan or kettle with water and bring it to a boil. This boiling water will help create a steamy environment in the oven, ensuring your crème brûlée cooks evenly. Turn off the heat and cover to keep it warm.
Fill the Ramekins with Custard
Arrange four ramekins inside a 9x13-inch metal pan. Slowly stir the custard mixture before distributing it evenly. Fill each ramekin with about ½ cup of custard, leaving a little space at the top.
Bake the Crème Brûlée
Place the filled ramekins into the oven and pour hot water into the pan until it reaches halfway up the sides of the ramekins—be careful not to splash any water into the custards. Bake them until set but still slightly jiggly in the center, about 30 to 40 minutes. Checking its doneness is key; it should read between 175°F to 178°F (79°C to 81°C).
Cool and Refrigerate
Once baked, remove each ramekin carefully from the hot water using oven mitts and allow them to cool on a wire rack for 45 to 60 minutes. After they cool, wrap them with plastic wrap and refrigerate for at least three hours or up to three days. This waiting period allows the flavors to meld beautifully.
Caramelize the Sugar Topping
When ready to impress, retrieve your custards from the fridge. Pat the surface lightly with a paper towel to remove any moisture, then sprinkle a thin layer of granulated sugar on top. With a culinary torch, caramelize the sugar until it’s golden brown and crisp—be sure to move in small circles to avoid burning.
Serve with Style
Let the caramelized topping cool for about five minutes to harden. Present your elegant crème brûlée to your guests, perhaps garnished with fresh berries or mint for an added touch of class. This dessert not only delights the palate but also provides a beautiful visual centerpiece that’s sure to impress.
Now that you’ve gone through the steps, you might wonder where to share this delightful dessert. Consider inviting friends over for a dinner party or simply indulge in a little self-care with a refined home treat. Enjoy your culinary adventure!
Variations on Crème Brûlée
Flavored Crème Brûlée Options
Ready to shake things up with your crème brûlée? The great part about this classic dessert is how easily it adapts to different flavors. Consider:
- Chocolate: Add melted dark chocolate to your custard for a rich twist.
- Coffee: Infuse the cream with a few tablespoons of brewed espresso for a delightful caffeine kick.
- Citrus: Zest an orange or lemon into the cream for a refreshing citrus burst.
These variations can elevate your dessert game, offering something new and exciting each time!
Dairy-Free and Low-Sugar Alternatives
If you're seeking a healthier or dairy-free option, you're in luck! Try blending coconut cream with almond milk for a delicious, non-dairy crème brûlée. For those watching their sugar intake, reduce the sugar in the custard and top with a sugar-free caramel or a light dusting of coconut sugar instead.
These alternatives make indulgence possible for everyone, ensuring you won’t have to give up dessert! For more tips, check out resources like the American Heart Association for healthy ingredient swaps.
Cooking Notes for Crème Brûlée
Tips for Achieving the Right Texture
To get that creamy crème brûlée texture, focus on your baking method. A water bath (bain-marie) is key to achieving even cooking, preventing the custard from curdling. Use a thermometer to monitor the temperature; you’re aiming for 175-178°F (79-81°C) for that smooth finish. If you want an extra-silky feel, consider straining the mixture to remove any air bubbles or curds.
Troubleshooting Common Issues
If your crème brûlée comes out grainy, it’s likely due to cooking it too quickly; use that water bath method to regulate heat. For an uneven set, ensure you've mixed evenly and used fresh, pastured eggs for the best results. Finally, avoid using too much sugar when caramelizing, as it can burn and create a bitter taste. Have patience—it’s worth it for the perfect dessert!
Serving Suggestions for Crème Brûlée
Pairing with Fresh Fruits or Sauces
Elevate your crème brûlée by pairing it with a colorful array of fresh fruits like berries, peaches, or citrus segments. The tartness of raspberries or the sweetness of strawberries beautifully complements the rich, creamy texture of the custard. Alternatively, drizzle a fruity sauce, such as a raspberry coulis or a tangy passion fruit reduction, for an added layer of flavor. These combinations not only enhance taste but also add a stunning visual element to your dessert plate.
Presentation Ideas to Impress Guests
When it comes to impressing guests, crème brûlée deserves a little flair! Consider serving the custard in unique ramekins or even in mason jars for a rustic touch. To wow your friends, add a sprig of fresh mint or a delicate edible flower on top, contrasting nicely with the crispy caramelized sugar. For an upscale vibe, use a shallow dish, and arrange fresh fruit around the crème brûlée, creating an eye-catching dessert centerpiece. Explore more creative presentations here.
Time Breakdown for Crème Brûlée
Preparation time
Getting started with your crème brûlée takes about 15 minutes. This includes gathering your ingredients, extracting vanilla, and prepping your ramekins.
Cooking time
You'll spend approximately 30 minutes in the oven, baking the custard to creamy perfection while it sets.
Cooling and chilling time
Patience is key! Allow for around 3 hours in the refrigerator for the custard to chill, and an optional 60 minutes at room temperature for the hardened sugar crust to form beautifully before serving.
For more insights and tips on mastering this classic French dessert, check out this article on creating the perfect crème brûlée.
Nutritional Information for Crème Brûlée
When indulging in a classic crème brûlée, it’s good to know what you’re savoring. Here’s a quick breakdown of the nutritional highlights:
- Calories: Each serving packs about 543 calories, making it a decadent treat.
- Protein: With 6 grams of protein per serving, this dessert has a bit of muscle.
- Fat Content: You’re looking at approximately 44 grams of fat, primarily from the heavy cream, which gives it that luxurious richness.
For more insight into what makes this dessert special, check out Healthline's guide on cream. Enjoy your delicious creation!
FAQs about Crème Brûlée
Can I make crème brûlée ahead of time?
Absolutely! In fact, making crème brûlée a day in advance enhances its flavor and texture. Just prepare the custard and refrigerate it for a minimum of three hours or up to three days. When you're ready to serve, simply add the sugar topping and caramelize it right before enjoying. This makes it a fantastic dessert for entertaining!
What tools do I need to caramelize the sugar?
To achieve that signature crispy top, you’ll need either a culinary torch or a broiler. If using a torch, make sure to keep it a few inches from the surface and move it in circles to avoid burning any one spot. For broiling, place the ramekins about six inches from the heat. There are also alternative methods like using a hot spoon if you want to get creative!
How should I store leftover crème brûlée?
If you have any leftovers (which is rare!), cover the ramekins tightly with plastic wrap or lid and store them in the refrigerator for up to three days. Just remember to add the sugar and caramelize the top right before serving for the best texture. For more tips on storage, check out this helpful guide.
Conclusion on Crème Brûlée
Making your own crème brûlée can be a delightful culinary adventure. The experience of caramelizing that sugar and cracking the top is genuinely satisfying! Don’t hesitate to try this elegant dessert yourself—it's simpler than you might think and perfect for impressing guests or enjoying a cozy night in.
Crème Brûlée: Easy Indulgence for Homemade Dessert Lovers
Equipment
- medium saucepan
- fine-mesh sieve
- ramekins
- baking dish
- culinary torch
Ingredients
- 1 bean vanilla bean
- 1.75 cups heavy cream 414 ml
- 5 large egg yolks wait to separate
- 0.5 cups granulated sugar 100 g
- 4 cups water for water bath
- 4 teaspoons granulated sugar for topping, 18 g
Instructions
- Cut the vanilla bean pod in half lengthwise. Run the back a paring knife along the inside to scrape out the seeds.
- Set the oven rack to the middle position. Preheat the oven to 325ºF (163ºC).
- In a medium saucepan, add the heavy cream, vanilla bean seeds, and the pod. Heat on medium-low until the mixture reaches 180ºF (82ºC), about 10 to 12 minutes. Stir occasionally and make sure not to boil. Remove from the heat and allow the vanilla bean to infuse, approximately 5 minutes.
- Separate the egg yolks from the egg whites. In a medium bowl, add the egg yolks and sugar, gently whisk to incorporate.
- Set a fine-mesh sieve over a medium bowl. Slowly pour the cream through, scrape the bottom of the sieve against the edge of the bowl to incorporate any vanilla seeds.
- Gradually add ⅓ cup of cream mixture into the egg mixture while whisking slowly to incorporate. Repeat with another ⅓ cup. Add the remaining cream into the egg mixture, making sure to scrape any vanilla seeds left in the bowl.
- In a medium saucepan or kettle, add the water and bring it to a boil. Turn off the heat, cover to keep hot. This will be used to make the water bath.
- Place four (4-ounce) ramekins inside a 9X13-inch metal pan. Slowly stir the egg mixture before adding. Fill each ramekin with ½ cup custard, or until almost full. Gently stir each one to distribute any vanilla seeds that may have sunk to the bottom. Pop any bubbles on the surface.
- Pour enough of the boiling water into the baking dish to come halfway up the sides of the ramekins. Be careful not to pour any water into the cups.
- Bake until the crème brulee sets, but still has a slight wiggle in the center, approximately 30 to 40 minutes. After 30 minutes, open the oven and gently tap the sides of the ramekins to check for doness. Bake longer as needed, checking every 5 minutes. The temperature should be between 175 to 178ºF (79 to 81ºC) in the center.
- Use an oven mitt to carefully remove each ramekin from the pan and transfer it to a wire rack. Let them cool to room temperature, about 45 to 60 minutes.
- Individually wrap each ramekin with plastic and place in the refrigerator for a minimum of 3 hours to set the custard, or refrigerate for up to 3 days.
- When ready to serve, remove the crème brulee's from the refrigerator. Gently blot any moisture on the surface with a paper towel. Evenly sprinkle 1 teaspoon of granulated sugar over the top of each ramekin. Hold at a slight angle, and gently tap the side so the sugar evenly covers the surface.
- Using a culinary torch, ignite and hold it 3 to 4 inches from the ramekin. Start along the edges, moving in small circles, until you reach the middle of the custard. Continue this movement until the surface is browned and caramelized, being careful not to overburn the sugar. Repeat with each ramekin.
- Once caramelized, let the sugar cool for five minutes at room temperature to harden. Alternatively, refrigerate for 5 minutes to cool the warmed custard beneath. The custards can be chilled uncovered for up to 1 hour and still have a hard crust. If desired, the surface can be torched for a few seconds to make the surface crisper.
Leave a Reply