
Introduction to Crunchy Chicken Taco Fingers
If you’re tired of the same old takeout or pre-packaged meals, homemade tacos are a game changer. Picture this: tender chicken coated in a crispy panko breadcrumb crust, all nestled in a warm tortilla with your favorite toppings. Not only do you get the satisfaction of creating a dish from scratch, but you also have full control over the ingredients, freshness, and flavor profile. It’s a win-win situation for busy professionals who want to eat well without sacrificing time or taste.
Making crunchy chicken taco fingers is not just a delightful culinary adventure; it can also be a fun activity to share with family or friends. With customizable toppings like avocado, slaw, and zesty sauces, everyone can create their own perfect taco. Did you know that according to the National Chicken Council, Americans consume over 90 million pounds of chicken during Super Bowl weekend alone? Now, imagine the joy of serving up crunchy, homemade delights at your own gathering. If you want to level up your taco game and impress your guests, keep reading for this exciting recipe that promises simplicity without compromising on flavor.
For more taco inspiration, check out this guide to grilling chicken and other delicious options!
Ingredients for Crunchy Chicken Taco Fingers
Chicken and the Crunchy Coating
To create the delectable crunchy chicken taco fingers, start with 500g (1 lb) of chicken tenderloins. Cutting them into 1.5-2 cm strips ensures that they cook evenly, staying juicy inside while achieving that perfect crispy exterior. For the coating, panko breadcrumbs are a game-changer. These larger, airier crumbs give an unparalleled crunch—perfectly elevating your chicken fingers!
Taco Seasoning Essentials
Flavor is key! Combine 2 teaspoons of cumin powder and paprika (opt for regular or sweet) with garlic powder, onion powder, dried oregano, and a touch of cayenne pepper for a kick. This homemade taco seasoning offers a deliciously vibrant taste profile and is easy to whip up. For a guide on spice usage, check out this resource.
Dredge-Batter Ingredients
The magic happens with the dredge mix! You only need two large eggs, three tablespoons of all-purpose flour, and two tablespoons of mayonnaise (or olive oil). A pinch of salt brings it all together, creating a batter that lovingly clings to the chicken, setting the stage for the panko breadcrumbs to adhere beautifully.
Tacos and Toppings
For assembling your tacos, opt for 12 to 16 soft tortillas. Don’t forget to include fresh toppings like a zesty taco slaw, slices of ripe avocado, and a drizzle of Sriracha for a culinary explosion. Adding chopped cilantro can brighten each bite! For more taco topping ideas, explore this taco topping guide.
Preparing Crunchy Chicken Taco Fingers
Creating the perfect crunchy chicken taco fingers is an enjoyable process that results in a delightful meal everyone will love. From preparing the chicken to assembling the tacos, let's dive into how to make this incredibly tasty dish that packs a punch in flavor.
Preheat the Oven and Toast the Panko
Start by preheating your oven to 200°C (400°F). This temperature is crucial for achieving that lovely golden crisp on your chicken fingers. While the oven heats, grab a bowl and mix the panko breadcrumbs with the taco seasoning until well combined. Next, pour this mixture onto a baking tray and lightly spray it with some olive oil. This will help toast the panko and give it that irresistible crunch. Spread the panko out in a single layer and toast it in the oven for about 7 minutes, giving it a gentle stir halfway. Keep an eye on it; you want it perfectly golden!
Combine the Taco Seasoning with Panko
In your toasted panko bowl, make sure you use a quality taco seasoning blend to infuse great flavor throughout. The mix of cumin, paprika, garlic, onion powder, oregano, and a hint of cayenne pepper will bring the necessary heat (optional, of course!) and zest to your chicken. If you're new to DIY taco seasoning, this can be a fun and delicious way to switch things up.
Prepare the Dredge Batter
Now, let’s make the dredge batter. In a mixing bowl, whisk together two large eggs, three tablespoons of flour, and two tablespoons of mayonnaise (or olive oil) along with a pinch of salt. You want this mixture to achieve a consistency similar to maple syrup. The eggs help in binding the breadcrumbs to the chicken, while mayonnaise lends an extra kick of flavor and moisture.
Dredging and Coating the Chicken Fingers
Once you have everything set, grab your chicken tenderloins. Toss them all in the dredge batter, ensuring each piece is well-coated. Using one hand to work with the chicken and the other for the panko, dip each finger into the toasted panko mixture. Gently press the crumbs onto the chicken, letting any excess drip off before placing them on a sprayed baking rack. The rack is essential; it lets the hot air circulate and keeps the chicken fingers crispy on all sides!
Baking the Chicken and Warming the Tortillas
While the chicken bakes at the same time as your tortillas warm, make sure to keep the environment cozy. Bake your chicken fingers for approximately 12 minutes, and wrap your tortillas in foil to warm them in the oven for the same duration.
Assemble the Tacos
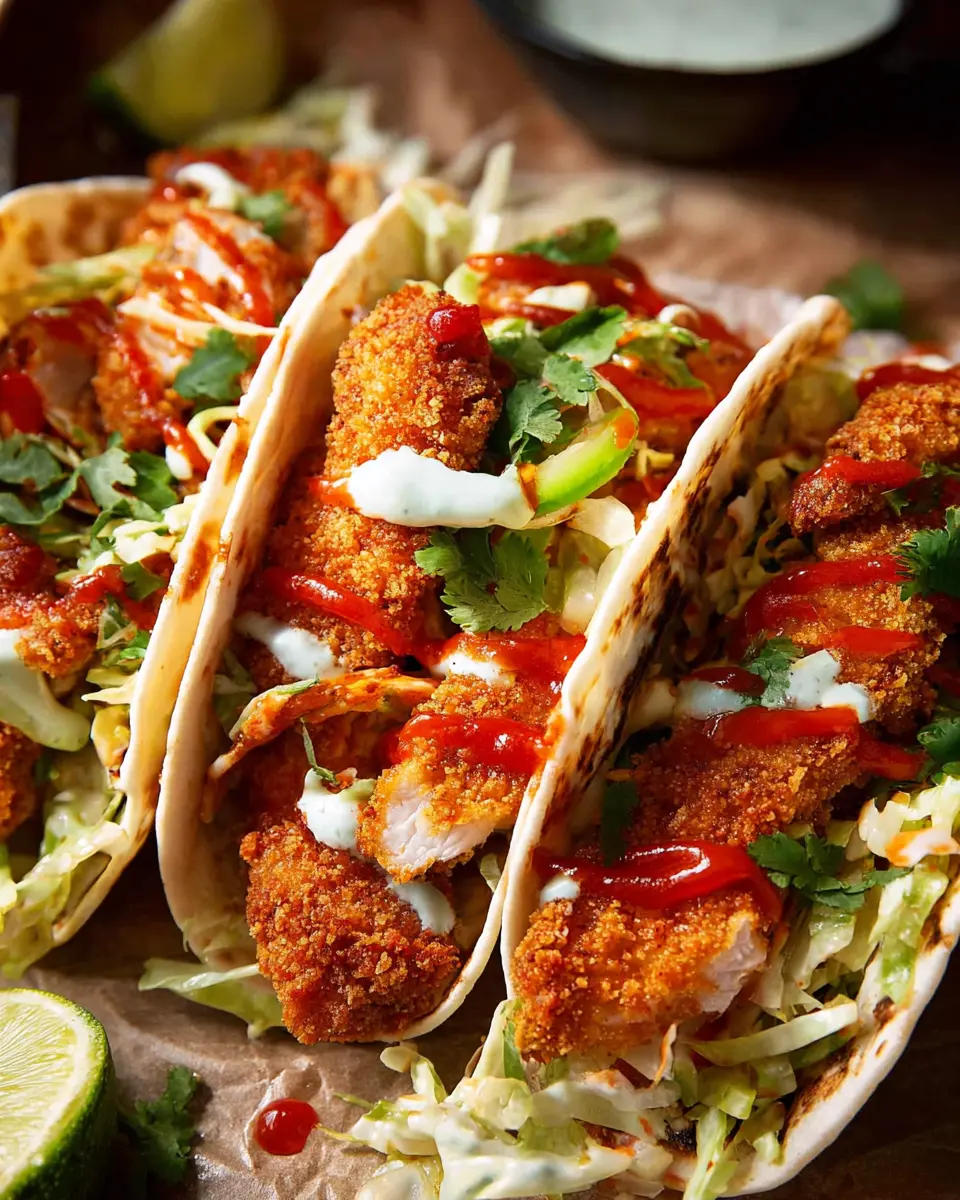
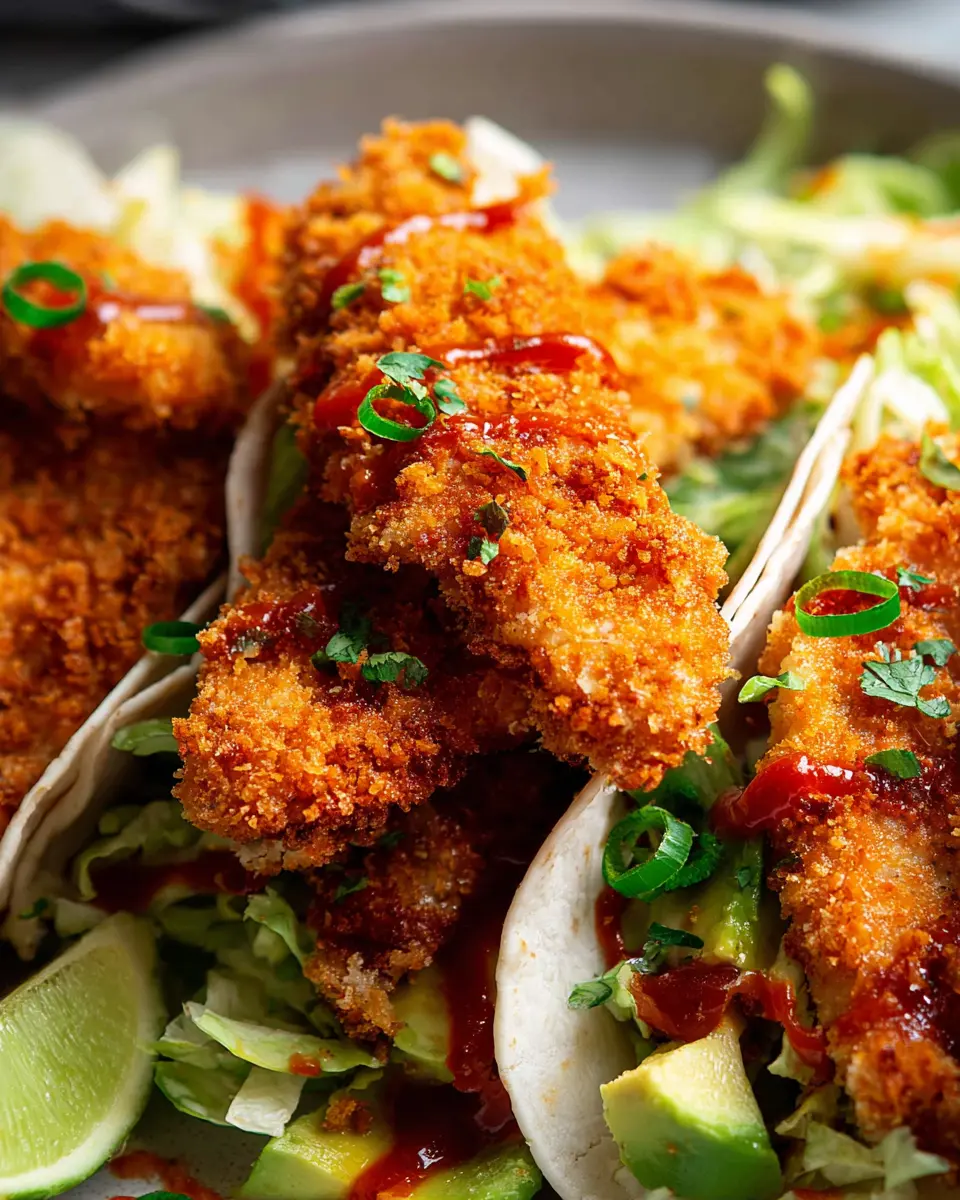
Now comes the fun part—assembling your tacos! Lay out a warm tortilla and pile on your crunchy chicken finger, followed by some taco slaw, avocado slices, and a drizzle of sriracha for that kick. Finish off with fresh cilantro leaves, and there you have it—delicious crunchy chicken taco fingers, ready to be devoured.
Enjoy this delightful meal any night of the week, and don't be surprised if they become a family favorite!

Variations on Crunchy Chicken Taco Fingers
Spicy Taco Fingers with Added Heat
If you're a fan of bold flavors, why not kick up your crunchy chicken taco fingers with a spicy twist? You can add an extra dash of cayenne pepper or blend in chopped jalapeños to the dredge for an authentic kick. For those who love heat, consider drizzling your finished tacos with a zesty habanero sauce. This fiery version is sure to please spice enthusiasts!
Gluten-Free Options
Craving crunchy chicken taco fingers but need a gluten-free option? No problem! Simply substitute the panko breadcrumbs with gluten-free alternatives, which are readily available at most grocery stores. You can also use cornstarch or ground oats for a delightful crunch. Don't forget to ensure your tortillas are gluten-free, too! This way, everyone can enjoy the meal together without compromising on taste. For more gluten-free recipe ideas, check out the Gluten-Free Goddess for inspiration!
Cooking tips and notes for Crunchy Chicken Taco Fingers
Tips for achieving maximum crunch
To ensure your crunchy chicken taco fingers reach optimal crispiness, start by using panko breadcrumbs instead of regular ones. Lightly toast them beforehand, and don’t skimp on the olive oil spray during baking—this helps create that golden, crunchy exterior. For extra crunch, consider double-dipping: coat the chicken in the dredge, then the crumbs, and spray again before baking. Remember to use a wire rack for baking; it promotes airflow and prevents sogginess.
Best practices for storing leftovers
Leftover crunchy chicken taco fingers can be stored in the fridge for 3 to 4 days. To revive their crunch, simply reheat them in the oven for about 5 minutes. For best results, avoid microwaving, as that can make them soggy. If you want to prepare them in advance, crumb the chicken but bake it just before serving; this keeps that delightful crunch intact! For more food storage tips, check sites like FoodSafety.gov.
Serving suggestions for Crunchy Chicken Taco Fingers
Accompaniments for the perfect taco experience
To enhance your Crunchy Chicken Taco Fingers, consider a variety of vibrant toppings and sides. Fresh ingredients like zestful avocado slices, crisp taco slaw, or a dollop of creamy sour cream can elevate the flavors. For an extra kick, drizzle some Sriracha or use a homemade Avocado Sauce. If you're open to new flavors, add in pico de gallo or fresh herbs like cilantro for a refreshing twist. Don't forget the tortillas—softened and warm, they're key to the perfect taco experience!
Creative serving ideas
Think outside the typical taco! Use crunchy chicken taco fingers as a delightful appetizer at your next gathering. Serve these golden bites with an array of dipping sauces, like honey mustard or a spicy queso dip. You could also transform them into a taco bar, letting guests pick their ingredients, adding a fun and interactive element to mealtime. For a more sophisticated touch, layer the chicken fingers over a salad base with a drizzle of zesty dressing—it's a simple yet delightful dish that’s both nutritious and filling!
Time breakdown for Crunchy Chicken Taco Fingers
Preparation time
Getting ready for these crunchy chicken taco fingers doesn’t take long, with a preparation time of about 15 minutes. This is the time spent cutting the chicken and mixing your flavorful taco seasoning—all the pre-work that leads to deliciousness!
Cooking time
Once everything is prepped, the actual cooking time is around 12–20 minutes in the oven—7 minutes for toasting the panko and 12 minutes for baking the chicken. It’s quick and straightforward, perfect for a weeknight dinner or a casual get-together.
Total time
In total, you can expect to spend approximately 30–35 minutes from start to finish. So, whether you’re whipping these up after work or planning a fun Taco Tuesday, you’ll have these delightful bites ready in no time! If you want some additional sauces or toppings, you might want to set aside a few extra minutes for that.
For more taco ideas, check out Taco Slaw or explore various salsa dips for dipping. Enjoy your cooking!
Nutritional Facts for Crunchy Chicken Taco Fingers
When whipping up a batch of Crunchy Chicken Taco Fingers, it’s great to know what you’re putting on your plate. Each taco filled with these delectable chicken strips brings a balance of flavors and nutrition to your meal. Here’s a quick breakdown of the essential nutritional facts:
Calories
Enjoying a serving of Crunchy Chicken Taco Fingers is a guilt-free indulgence at just 128 calories per taco, allowing you to savor every crispy bite without compromising your meal plan.
Protein
Each taco is packed with 9g of protein, making it a solid option for a fueling lunch or dinner. Incorporating protein into your meals not only supports muscle health but also helps keep you feeling satiated longer.
Sodium
Keep an eye on your sodium intake! A serving contains about 362mg of sodium. While this is a moderate amount, it’s always good to pair these with fresh ingredients like guacamole or salsa to balance the flavors without adding too much salt.
These Crunchy Chicken Taco Fingers are not just a delightful treat but also a smart choice to incorporate into your weekly meal plan. For more inspiration on creating health-conscious meals, explore additional articles on healthline.com or nutritional guidelines at eatright.org.
FAQs about Crunchy Chicken Taco Fingers
Can I make these ahead of time?
Absolutely! While it's best to bake the crunchy chicken taco fingers just before serving for that fresh, crispy texture, you can prepare the chicken by crumbing it earlier. Once coated, keep them in the fridge until you're ready to bake. Just remember, they shouldn't sit for too long, as the dredge could soak into the crumbs.
What should I do with leftovers?
Leftover crunchy chicken taco fingers will keep well in the fridge for about 3 to 4 days. To maintain that delightful crunch, give them a quick 5-minute reheat in the oven before enjoying them again. They also make a great addition to salads or wraps!
How can I customize the taco toppings?
The beauty of crunchy chicken taco fingers lies in their versatility. Top your tacos with anything that tickles your fancy! Consider options like shredded lettuce, diced tomatoes, or even a zesty pico de gallo. For a creamy finish, you might add sour cream or guacamole for a delicious twist. Don’t hesitate to let your creativity shine!
Conclusion on Crunchy Chicken Taco Fingers
Crunchy chicken taco fingers are a delightful twist on traditional tacos, marrying crispy flavors with satisfying textures. Ideal for gatherings or a cozy night in, they're easy to prepare and customizable with your favorite toppings. Try serving with avocado sauce or a tangy salsa for an extra flavor kick. Enjoy every bite!

Crunchy chicken taco fingers
Equipment
- oven
- mixing bowl
- baking tray
- rack
- spray bottle
Ingredients
Chicken and Dredge
- 500 g chicken tenderloins cut in half lengthways into strips
- 2.25 cups panko breadcrumbs
- to taste Olive oil spray
- 2 large eggs
- 3 tablespoon flour plain / all-purpose
- 2 tablespoon mayonnaise or extra virgin olive oil
- 1 pinch salt
Taco Seasoning
- 2 teaspoon cumin powder
- 2 teaspoon paprika regular or sweet
- 1 teaspoon garlic powder sub onion powder
- 1 teaspoon onion powder sub garlic powder
- 1 teaspoon dried oregano
- 0.25 teaspoon cayenne pepper optional
- 1 teaspoon cooking salt halve for table salt
For Tacos
- 12-16 taco-size soft tortillas
- 1 batch Taco Slaw for filling
- 1 large avocado sliced
- to taste Sriracha for drizzling
- 2 tablespoon roughly chopped coriander/cilantro leaves
Instructions
Preparation
- Preheat the oven to 200°C/400°F (180°C fan-forced).
- Mix the panko and Taco Seasoning in a bowl, spray with olive oil, and bake for 7 minutes.
- Whisk the Dredge ingredients until lump-free, then coat the chicken pieces in the batter.
- Coat the battered chicken in the toasted panko butter and place on a sprayed rack.
- Warm tortillas by wrapping in foil and place them in the oven while the chicken bakes.
- Bake the chicken fingers for 12 minutes or until cooked through and crispy.
- Assemble tacos with tortillas, Taco Slaw, avocado slices, chicken fingers, Sriracha, and coriander.


Leave a Reply