
Introduction to Homemade Apple Cider Vinegar
Making your own apple cider vinegar is more than just a fun kitchen project; it's a transformative way to elevate your cooking and wellness routine. So why is homemade apple cider vinegar a game-changer? For starters, nothing beats the rich, tangy flavor of vinegar you crafted with your own hands. Store-bought options can be full of additives or lack the depth of flavor that comes from fermentation.
Plus, you have total control over the ingredients. You can use organic apples or scraps, minimizing waste while packing your vinegar with the nutrients and natural goodness of fresh fruit. Research has shown that homemade apple cider vinegar can promote digestive health and even assist in weight management, thanks to its acetic acid content (Healthline).
Additionally, crafting your own apple cider vinegar means you're surrounded by the delightful aroma of fermenting apples, creating an inviting atmosphere in your kitchen. Whether you're drizzling it on salads, adding it to marinades, or even using it for household cleaning, homemade apple cider vinegar offers endless possibilities. So let’s dive into how to make homemade apple cider vinegar and add this delightful staple to your pantry!
Ingredients for Homemade Apple Cider Vinegar
What you need for basic apple cider vinegar
When it comes to how to make homemade apple cider vinegar, simplicity is key. Here’s what you’ll need to get started:
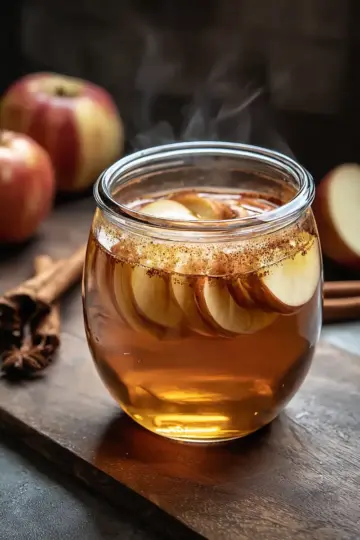
- Diced apple chunks or apple scraps: You can use skins, cores, or any leftover pieces of apples. Aim to fill half of your fermenting vessel, whether it’s a quart jar, half-gallon jar, or a one-gallon crock.
- Filtered water: The liquid gold that helps transform your apples into vinegar.
- Sugar: This is crucial because it fuels fermentation. Use about 1 tablespoon of sugar for every cup of filtered water or 1 cup of sugar for every gallon.
Optional ingredients to enhance flavor
Once you’ve nailed the basics, consider adding optional ingredients to take your vinegar to the next level. Some popular additions include:
- A splash of store-bought organic apple cider vinegar: This helps kickstart the fermentation process.
- Flavorings: Try adding spices like cinnamon sticks, cloves, or even zest from citrus fruits for a unique twist.
With just a few ingredients, you’re well on your way to creating a deliciously tangy apple cider vinegar! Want to learn more? Check out this resource on fermentation for deeper insights!
Step-by-step Preparation of Homemade Apple Cider Vinegar
Making your own apple cider vinegar is not just a fun project; it’s also incredibly rewarding! Here’s a comprehensive guide on how to make homemade apple cider vinegar that will take you through each step to ensure your endeavor is successful and tasty.
Gather and Prepare Your Apples
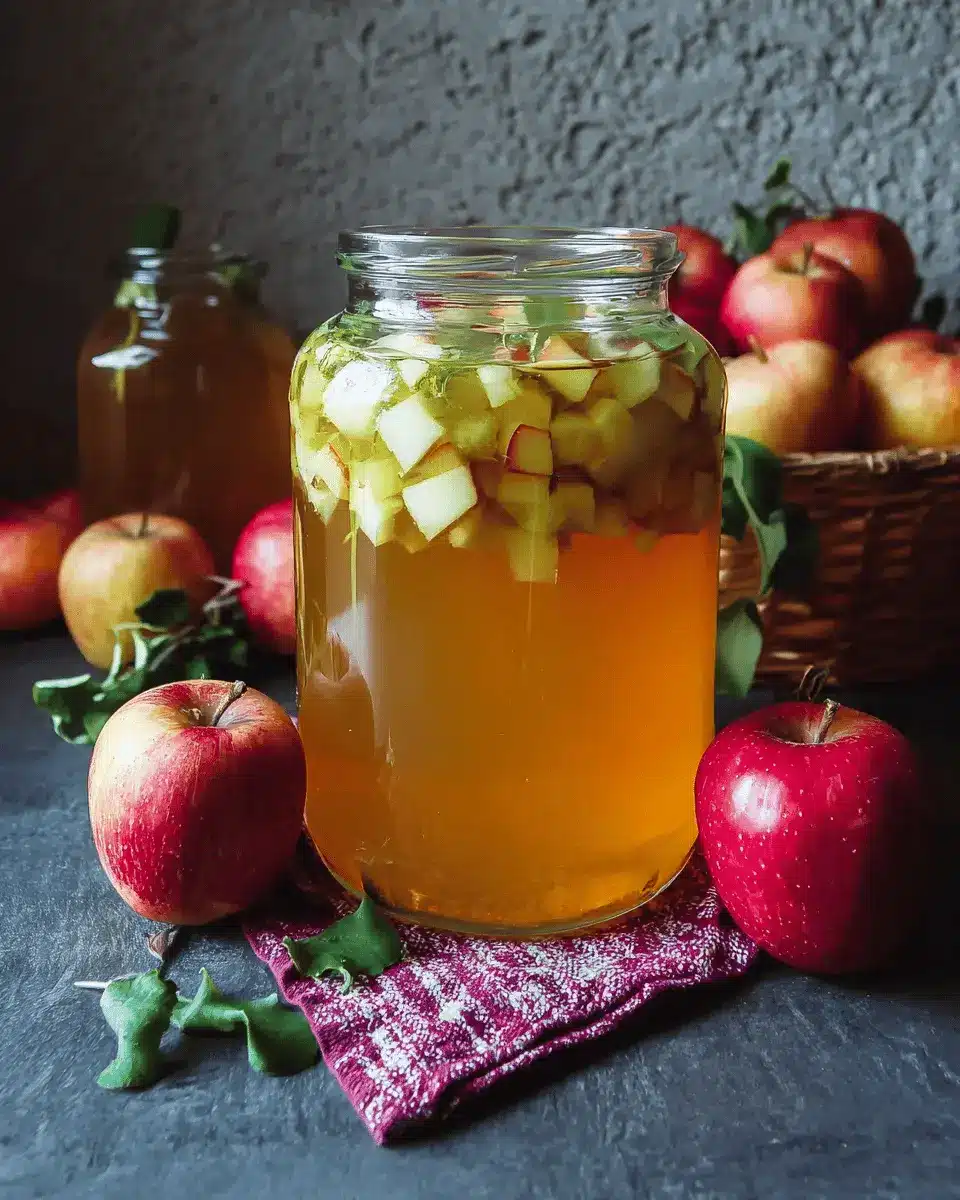
Start by collecting your apples. You can use fresh apples, but don’t overlook the power of scraps! Apple peels, cores, or any leftover bits will work perfectly. Aim to fill your fermenting vessel (like a quart or gallon jar) about halfway with these diced apple chunks or scraps. Make sure to wash them thoroughly to remove any pesticides or dirt.
Combine Apples and Water in Your Fermenting Vessel
Next, pour lukewarm filtered water over your apples until the vessel is almost full. It’s important to measure how much water you add; this will help you determine the precise amount of sugar needed later. The water should cover the apples completely to encourage a good fermentation process. If you want a quicker method, consider adding a splash of finished organic apple cider vinegar to kickstart the fermentation.
Add Sugar and Mix Thoroughly
Sugar is essential for fermentation, as it feeds the wild yeast present in the environment. You'll want to add one tablespoon of sugar for every cup of water or one cup per gallon. As you introduce the sugar, stir the mixture vigorously until everything is dissolved. This is a crucial step to ensure the fermentation process runs smoothly.
Ferment the Mixture for the First Two Weeks
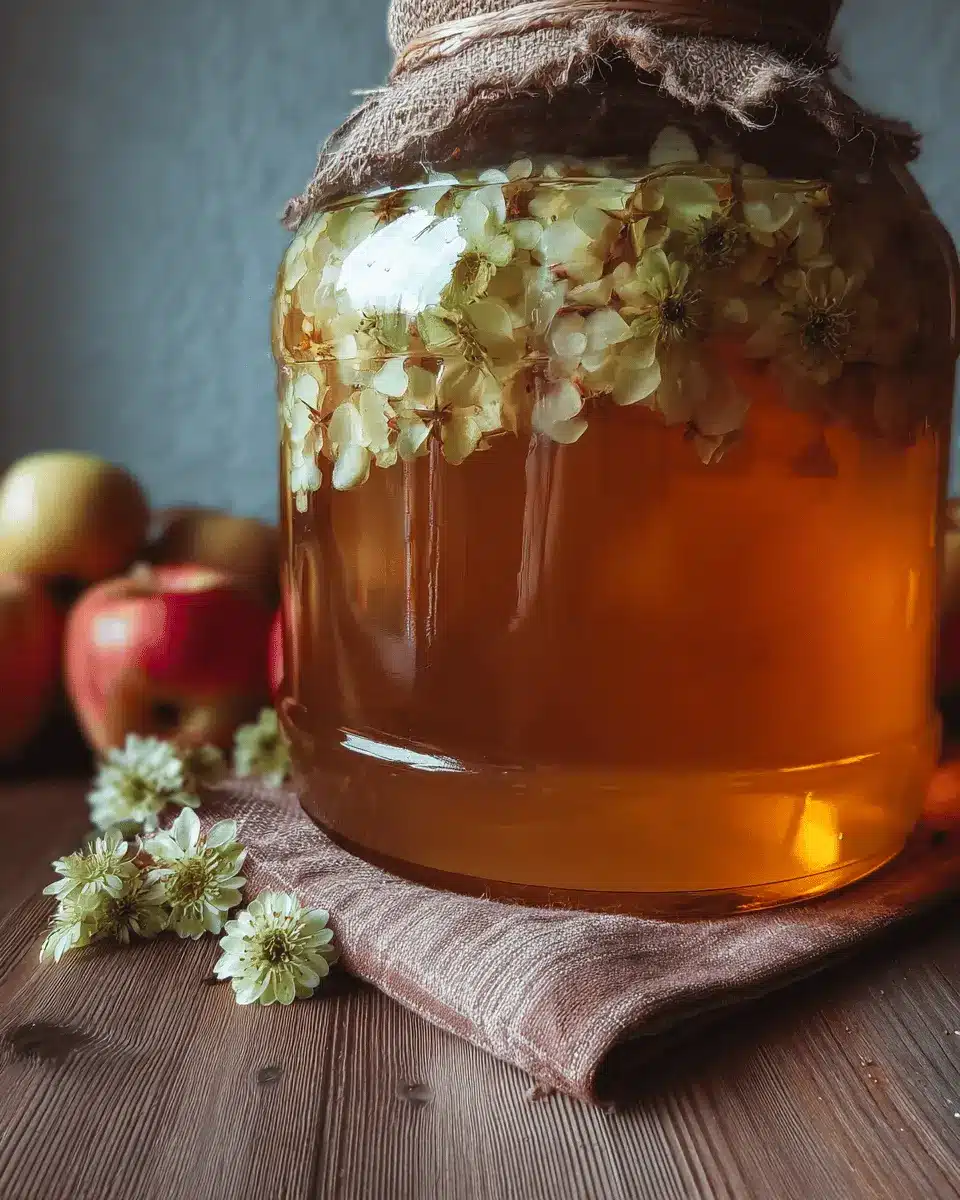
Once your mixture is ready, cover the vessel with breathable materials like a cheesecloth or a clean kitchen towel. Store it in a dark place at a temperature of 70 to 75 degrees Fahrenheit. During the first two weeks, remember to stir it daily. This helps prevent any mold from forming on top and distributes the wild yeast throughout the mixture.
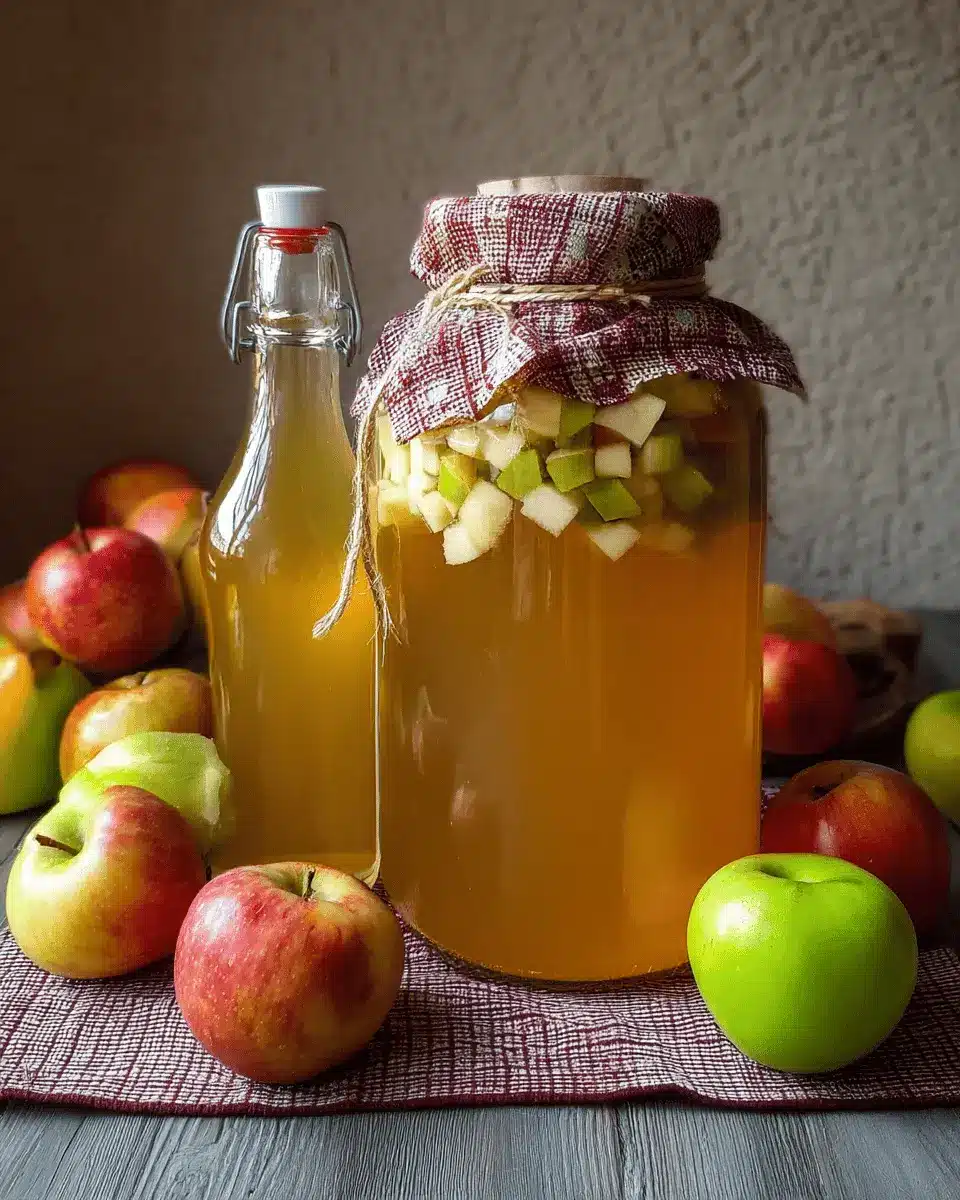
Strain and Transfer the Liquid to Continue Fermentation
After two weeks of fermenting, it’s time to strain the mixture. Use a fine mesh strainer to separate the liquid from the apple solids, which you can compost. Transfer the strained liquid back into a clean fermenting vessel and cover it again with breathable material. Now, let this sit undisturbed in a cool, dark spot.
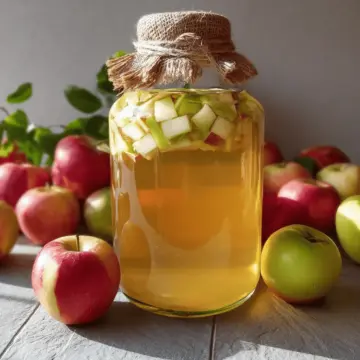
Check and Bottle Your Vinegar After Fermentation
After about a month, it’s time for a taste test! Check if the vinegar has reached your desired tanginess. If it still feels a bit mild, give it another month or two for further fermentation. Finally, once you're satisfied with the flavor, transfer the finished vinegar into bottles with lids or swing-top caps. Store it at room temperature or in the fridge, where it should remain good for over a year, as long as you notice no visible mold or weird flavors.
By following these steps, you’ve now mastered how to make homemade apple cider vinegar! Enjoy your delicious creation in salads, marinades, or just as a refreshing tonic. Happy fermenting!
Variations on Homemade Apple Cider Vinegar
Adding herbs for a unique twist
Once you’ve mastered how to make homemade apple cider vinegar, consider enhancing it with fresh herbs for a delightful twist. Basil, rosemary, or thyme infuse vibrant flavors, creating a herbal vinegar perfect for dressings or marinades. Simply toss a handful of clean herbs into your fermenting vessel with the apples and watch as they meld during fermentation. This simple addition elevates your vinegar, making it uniquely yours!
Infusing with spices for additional flavor
Spices can add warmth and complexity to your apple cider vinegar. Think about adding sticks of cinnamon, cloves, or even slices of ginger. Each spice brings its character, creating wonderful possibilities for your vinegars. Similar to the herbs, add your chosen spices during the initial ferment. After a month or two, you’ll be left with a uniquely flavored vinegar that can elevate any dish. Explore various combinations to find your favorite blend!
For more tips on flavors and infusions, check out this guide on vinegar recipes.
Cooking Tips and Notes on Homemade Apple Cider Vinegar
Common mistakes to avoid during fermentation
Creating your own apple cider vinegar is rewarding, but there are a few common pitfalls to avoid. Make sure to stir daily; neglecting this can lead to mold formation. Use a breathable cover to allow air circulation while keeping out dust and pests. Finally, avoid using chlorinated water, as it can hinder fermentation—opt for filtered or spring water instead.
How to know if your vinegar is ready
Patience is key when learning how to make homemade apple cider vinegar. After about a month, taste your vinegar. It should be tangy with a pleasant acidity. If it’s not quite there, give it more time—up to two to three months is perfectly fine. Once you’ve achieved the desired flavor, transfer it to clean bottles and enjoy your homemade creation! For further reading on fermentation techniques, check out this expert guide.
Serving Suggestions for Homemade Apple Cider Vinegar
Incorporating Vinegar into Salads and Dressings
Once you’ve mastered how to make homemade apple cider vinegar, you’ll discover just how versatile it can be! A splash of your zingy creation elevates simple salads and dressings. Try combining it with olive oil, mustard, and your favorite herbs for a delightful vinaigrette. Experiment by adding honey or maple syrup for a touch of sweetness that balances the acidity perfectly!
Using Vinegar for Health Tonics
Homemade apple cider vinegar also shines as a health tonic. Many people swear by its benefits, from aiding digestion to boosting energy levels. Mix 1-2 tablespoons in a glass of water each morning or add it to herbal teas. You can explore different flavor combinations by infusing your vinegar with ginger or lemon, creating a refreshing drink packed with benefits. For more ideas, check out sources like Healthline for the latest on its health perks.
Your homemade vinegar can be a delightful addition to your daily routine—happy experimenting!
Time Breakdown for Homemade Apple Cider Vinegar
Understanding the timing involved in how to make homemade apple cider vinegar is essential for a successful batch. Below is a quick breakdown of the required time to guide you through the process.
Preparation time
Plan for about 30 minutes to wash, chop, and set up your ingredients. This includes gathering all necessary materials and preparing your fermentation station.
Fermentation time
The fermentation process lasts a minimum of two weeks, during which you'll need to stir the mixture daily. After this initial period, tasting will determine whether a longer fermentation is needed—typically, it can take up to two to three months for the vinegar to reach your preferred flavor.
Total time
Overall, from preparation to the final product, you're looking at around 2-3 months. It’s a bit of a wait, but this patience will reward you with deliciously tangy apple cider vinegar!
If you'd like to dive deeper into the nutrition facts or explore the benefits of using apple cider vinegar in your cooking, check out this informative resource.
Nutritional Facts for Homemade Apple Cider Vinegar
When diving into how to make homemade apple cider vinegar, it's essential to understand its nutritional profile.
Calories
Homemade apple cider vinegar is low in calories, with about three calories per tablespoon. This makes it a guilt-free addition to your food and drinks!
Acetic Acid Level
The primary active compound, acetic acid, typically ranges from 4% to 7% in homemade versions. This acidity is what gives vinegar its distinctive tang and contributes to many of its health benefits.
Health Benefits
Apple cider vinegar isn’t just a flavor enhancer; it’s packed with potential benefits! It may help regulate blood sugar levels, boost digestion, and even support weight loss efforts. For further insights into its health properties, check out Healthline's article on apple cider vinegar.
By knowing these nutritional facts, you can confidently enjoy your homemade creation, enhancing your meals while reaping the rewards of its health benefits!
FAQs about Homemade Apple Cider Vinegar
What if my apple cider vinegar has mold?
Mold can occasionally form on the surface of your homemade apple cider vinegar. If you see a bit of mold, scoop it off carefully, ensuring you don’t disturb the liquid below. As long as the vinegar underneath smells and tastes fine, it should still be safe. To prevent mold, stir your mixture daily during the fermentation process, which also helps keep the mixture oxygenated. Always consult a reliable source like the USDA if you're unsure about safety.
Can I use any type of apples?
Absolutely! While sweeter varieties like Honeycrisp or Fuji yield a tastier vinegar, using any apples or even scraps is perfectly fine. Just remember that the flavor of your vinegar will vary depending on the apples used. Choosing organic apples can also enhance the natural fermentation process since they’re less likely to have pesticides.
How should I store my homemade vinegar?
Once fermented to your liking, transfer your apple cider vinegar to bottles with lids and store them in a cool, dark place or the refrigerator. Properly stored, it can last over a year. Just keep an eye out for any unusual smells or appearance to ensure freshness.
For more tips on how to make homemade apple cider vinegar successfully, check out this guide.
Conclusion on Homemade Apple Cider Vinegar
Making your own homemade apple cider vinegar is not just a delightful project; it's empowering! With simple ingredients and a bit of patience, you can create a flavorful, tangy vinegar that enhances your dishes and drinks. Remember, the process allows room for creativity—experiment with flavors and enjoy the journey!
How to Make Homemade Apple Cider Vinegar
Equipment
- Fermenting vessel
Ingredients
- Diced apple chunks or apple scraps Enough to fill half of your chosen fermenting vessel
- 1 tablespoon Sugar per 1 cup filtered water
- 1 cup Sugar per 1 gallon of filtered water
Instructions
- Wash and chop the apples into chunks, or gather collected apple scraps and add them to your jar or large fermenting vessel until it is halfway full.
- Pour lukewarm filtered water over the apples into the container until it is almost full, and measure/note the total amount of water added.
- Stir in sugar in ratios of 1 tablespoon of sugar per cup of water added, or for larger batches, 1 cup of sugar per gallon of water added.
- Optional: Add a splash of finished organic apple cider vinegar to inoculate the culture and encourage fermenting.
- Stir combined ingredients until thoroughly mixed, and cover with breathable material.
- Store in a dark location around 70 to 75 degrees F for two weeks to ferment, stirring every day to prevent mold from forming on top.
- After two weeks, strain and reserve the liquid into a similar sized container and cover again. Compost the spent fruit.
- Move the covered container of liquid to a location that is out of the way to continue long-term fermentation, maintaining darkness.
- After one month, sample the vinegar to see if it is finished fermenting and tart to your liking. If needed, allow it to continue fermenting for a total of two to three months.
- Once it is fermented to your desired flavor, transfer the apple cider vinegar into bottles with lids. Store at room temperature or in the refrigerator.
- Properly fermented apple cider vinegar should stay good for over a year as long as it does not have visible mold or a strong and unusual flavor or appearance.


Leave a Reply