
Introduction to Peanut Butter Spider Cookies
When the scents of baking waft through the air, few treats can conjure as much nostalgia as classic peanut butter cookies. Soft, chewy, and irresistibly rich, these cookies have found a special place in kitchens and hearts. Whether you’re reminiscing about childhood or looking to impress guests, peanut butter cookies are a timeless choice.
Now, let’s take this beloved treat to spooky new heights with peanut butter spider cookies! These festive delights not only capture the essence of peanut butter goodness but also add a fun, creative twist perfect for any Halloween gathering. Imagine cookie monsters delighting in the chocolatey spider legs and adorable whopper bodies perched atop each cookie, transforming ordinary sweets into a whimsical feast.
According to the National Peanut Board, peanut butter is not just delicious; it’s also a good source of protein and healthy fats. This makes our cookies not only tempting but also somewhat nourishing! Why not indulge in a sweet that provides a little extra protein while satisfying your cravings? Let's dive into this unique recipe and make some Halloween memories together. For more delightful recipes, check out our friends at the Food Network or AllRecipes. Happy baking!
Ingredients for Peanut Butter Spider Cookies
If you're in the mood for a festive treat, these Peanut Butter Spider Cookies are a perfect choice. With a delightful blend of flavors and a fun, spooky appearance, they’re sure to be a hit at any gathering. Let’s look at what you’ll need to whip up this delicious recipe!
Essential Ingredients
- 1 ½ cups all-purpose flour: This will form the base of the cookies.
- ½ teaspoon baking soda and baking powder: These leavening agents help your cookies rise to perfection.
- ½ cup salted butter, softened: The key to that rich, buttery taste.
- ½ cup granulated sugar & ½ cup brown sugar: For a perfect balance of sweetness.
- 1 egg: Provides moisture and binds the ingredients together.
- ½ cup creamy peanut butter (not natural): Essential for that iconic peanut butter flavor.
- 1 teaspoon vanilla: Adds depth and warmth.
- 44 Whoppers: These will be the "bodies" and "heads" of your spooky spiders.
- 1 cup semi-sweet chocolate chips (6 ounces): Use these for the spider legs.
- 1 small tube white cake decorating gel: For some fun and creepy eye details.
- ¼ cup granulated sugar for rolling: Gives the cookies that extra sweet touch.
With these ingredients, you’ll be well on your way to creating a spooky dessert that’s both fun to make and delicious to eat!
Preparing Peanut Butter Spider Cookies
Making peanut butter spider cookies is a fantastic way to celebrate the whimsical side of baking, especially around Halloween. With their deliciously rich flavor and adorable spider designs, these cookies are sure to be a hit among friends and family. Let’s jump into the preparation steps!
Gather Your Ingredients
First things first! Gather all your ingredients to ensure a smooth baking experience. You’ll need the following:
- 1 ½ cups all-purpose flour
- ½ teaspoon baking soda
- ½ teaspoon baking powder
- ½ cup salted butter, softened
- ½ cup granulated sugar
- ½ cup brown sugar
- 1 egg
- ½ cup creamy peanut butter (avoid natural varieties for this recipe)
- 1 teaspoon vanilla extract
- 44 Whoppers (22 large and 22 small)
- 1 cup semi-sweet chocolate chips
- 1 small tube of white cake decorating gel
- ¼ cup granulated sugar for rolling
Having everything ready will make your baking process effortless—trust me!
Mix the Dry Ingredients
In a medium bowl, combine the all-purpose flour, baking soda, and baking powder. Whisk these dry ingredients together until they’re well blended. This step is crucial as it helps to ensure even baking and the perfect texture in your cookies.
Cream the Butter and Sugars
In a separate large bowl, cream together the softened butter, granulated sugar, brown sugar, and peanut butter until it’s smooth and fluffy. This step not only adds sweetness but also introduces air, giving your cookies that soft structure. Once combined, add the egg and vanilla extract, mixing until fully incorporated.
Incorporate the Wet Ingredients
Now, let's fold in the dry ingredients from the first step. Gradually incorporate the flour mixture into your wet ingredients, mixing just until everything is combined. Overmixing can lead to cookies that are dense, rather than soft and chewy.
Form and Roll the Cookie Dough
Using a 2-tablespoon cookie scoop, portion the dough and roll it into balls, then roll these in the extra granulated sugar. Place them on a baking sheet lined with parchment paper, spacing them about 2 inches apart.
Prepare the Spider Decorations
While your peanut butter spider cookies are baking, prepare your spider decorations. Create a pile of 22 large Whoppers for the spider bodies and 22 small ones for the heads. You’ll appreciate having this step done in advance!
Bake the Cookies
Bake the cookies in a preheated oven at 375°F for 8 to 10 minutes, or until they are just starting to turn golden brown. They’ll continue to cook a little as they cool, keeping them perfectly soft.
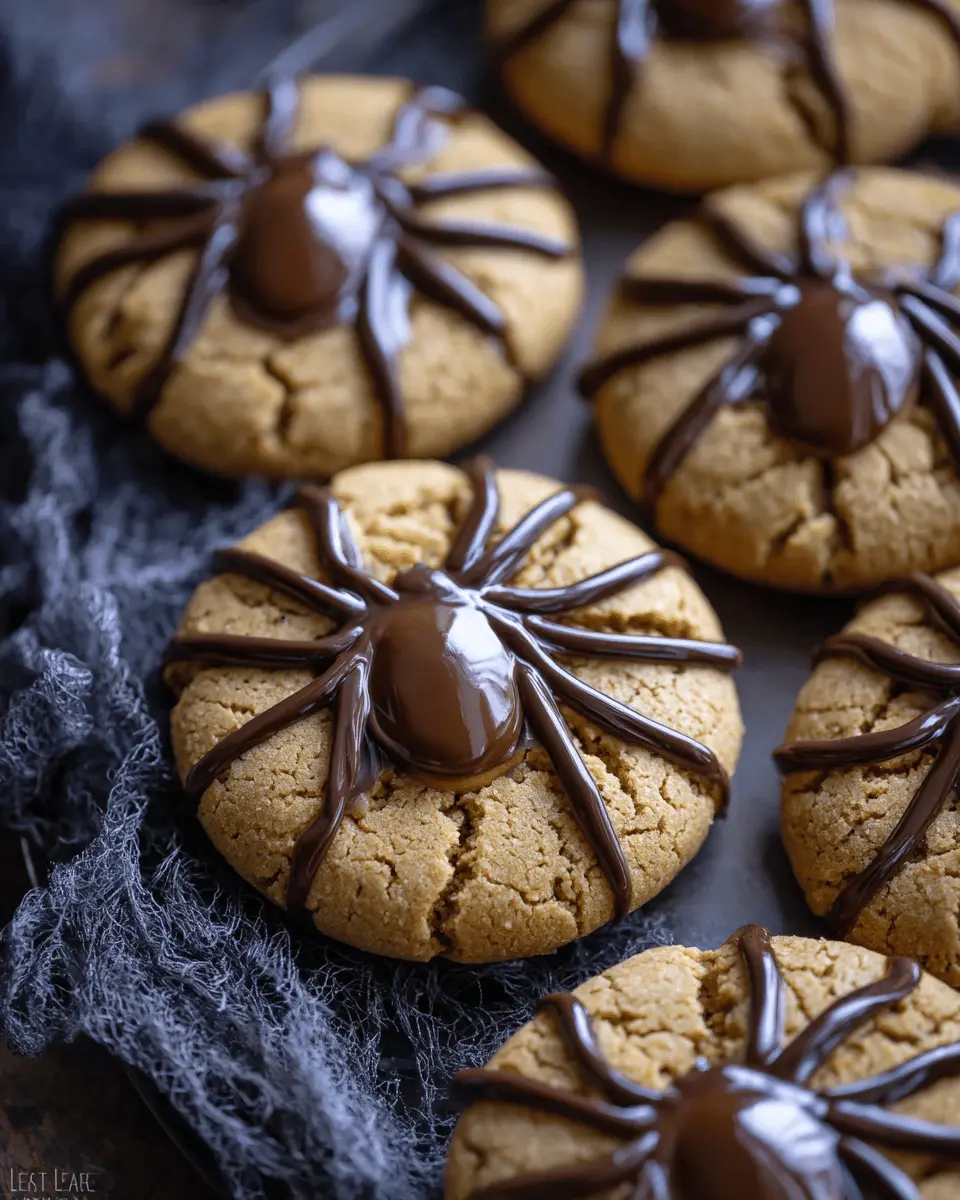
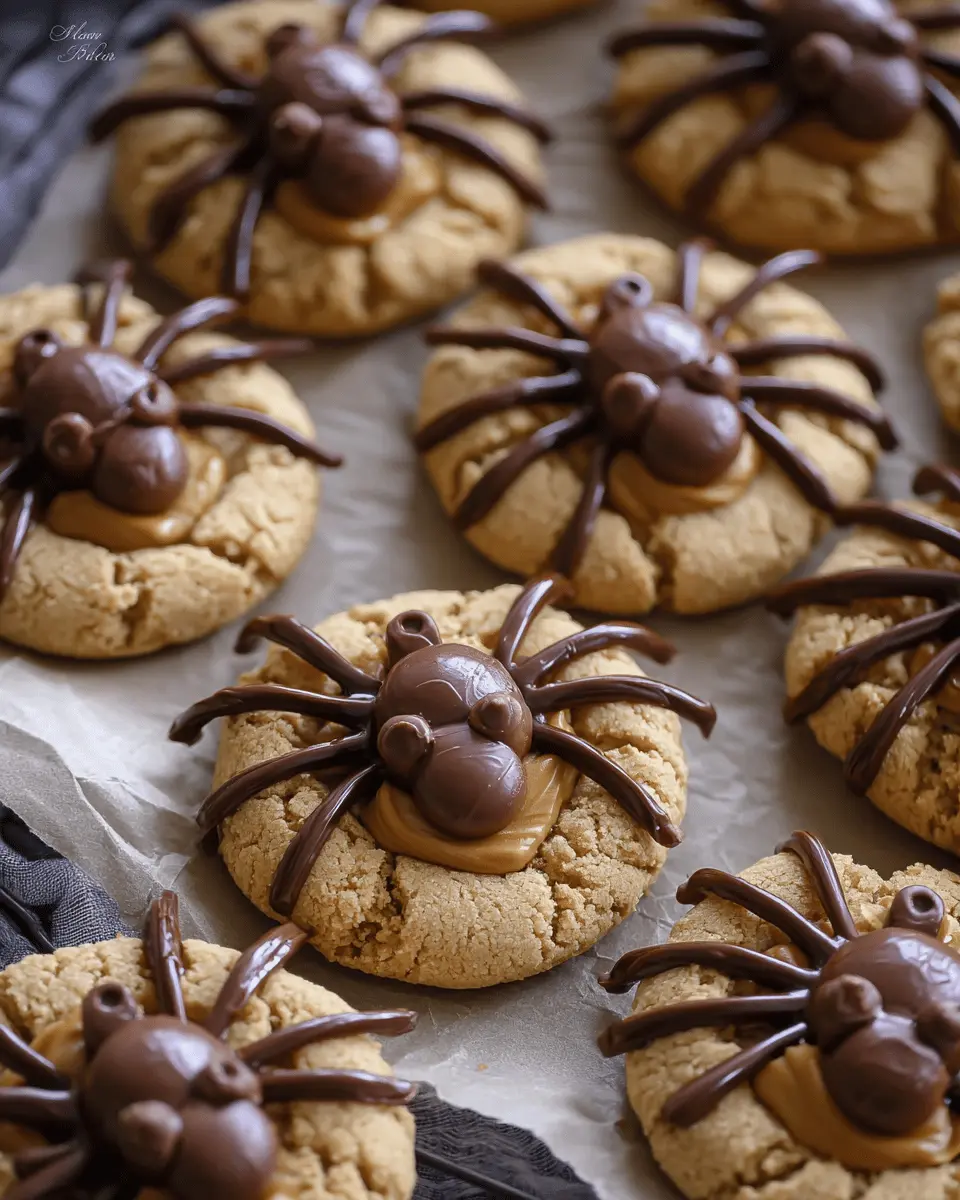
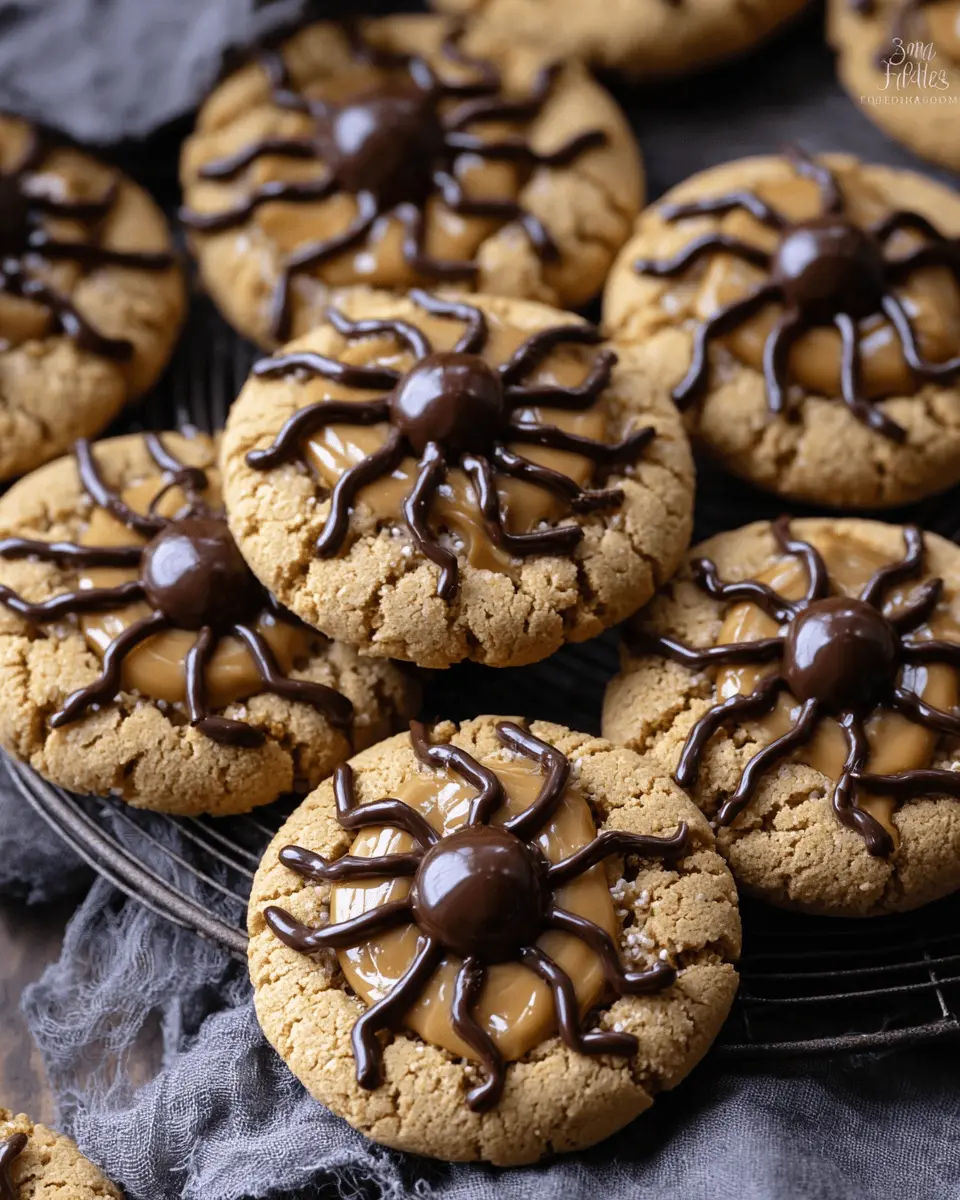
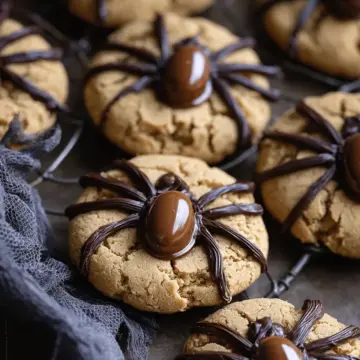
Create the Spider Design
Once removed from the oven, immediately press one large Whopper and one small Whopper into the top of each cookie to form a spider shape. Let them cool slightly, then melt the chocolate chips in the microwave, stirring to achieve a smooth consistency. Use a piping bag to draw the spider legs, creating a fun visual for your guests.
Topping it with little dots of white gel and a sprinkle for the eyes elevates the spooky effect!
Enjoy these delightful cookies at your next gathering, and watch as they steal the show!
For more creative baking ideas, check out this great source for delightful recipes.
Variations on Peanut Butter Spider Cookies
Crunchy Peanut Butter Version
For those who crave an extra crunch, swap out the smooth creamy peanut butter for crunchy peanut butter in your peanut butter spider cookies. The added texture not only enhances the flavor but gives the cookies a delightful bite. You can also fold in chopped peanuts for an even nuttier experience. If you’re feeling adventurous, consider adding a sprinkle of sea salt on top just before baking — it really complements the sweetness.
Allergic-Friendly Spider Cookies
If you're baking for those with allergies, fear not! You can create delicious peanut butter spider cookies without using peanut butter. Simply replace it with sunflower seed butter or almond butter, ensuring that you choose a brand that's free from cross-contamination if nut allergies are a concern. Additionally, swap out the semi-sweet chocolate chips for allergen-friendly varieties or enjoy these cookies without chocolate for a unique twist.
For more alternatives and ideas, check out sources like The National Peanut Board for allergy-friendly snacks and recipes!
Baking Notes for Peanut Butter Spider Cookies
Tips for Achieving the Perfect Texture
To get that ideal chewy yet slightly crispy texture of your peanut butter spider cookies, make sure not to overmix the dough. Once the dry and wet ingredients are combined, stop mixing to keep those cookies delightful and tender. And don't forget that different ovens may bake at slightly varying temperatures, so keep an eye on them during the last few minutes of baking.
Storage Tips for Freshness
To maintain the freshness of your cookies, store them in an airtight container at room temperature for up to a week. If you want to keep them even longer, freeze them! Just layer parchment paper between cookies to prevent sticking and enjoy a spooky treat anytime. For more tips on cookie storage, check out resources from the Food Network.
These little details can go a long way in making your peanut butter spider cookies a favorite!
Serving suggestions for Peanut Butter Spider Cookies
Creative ways to present your cookies
These Peanut Butter Spider Cookies aren’t just delicious; they’re visually captivating too! Consider arranging them on a festive Halloween platter, maybe placing them amongst some faux spider webs or plastic spiders to enhance their theme. For a personal touch, you could even gift a few cookies in a clear treat bag tied with orange and black ribbon. This makes for a fun and memorable surprise for friends or coworkers!
Perfect pairings for your cookies
To elevate the experience, pair your peanut butter spider cookies with a chilled glass of almond or oat milk. If you’re in the mood for something warm, a cup of spiced chai or hot cocoa will perfectly complement the rich flavors of the cookies. Planning a get-together? Consider serving them alongside a selection of seasonal fruits like apples or pears, which add freshness and balance to the indulgent sweetness of the cookies.
For more fun Halloween ideas, explore resources like Halloween Treats or Family-Friendly Halloween Recipes to keep the spooky snacks coming!
Time details for Peanut Butter Spider Cookies
Preparation time
Get ready to dive into the fun! The preparation time for these delightful peanut butter spider cookies is about 20 minutes. This includes gathering your ingredients and mixing them together to create the perfect cookie dough.
Baking time
Once you're all set, these cookies will need about 8 to 10 minutes in the oven. Keep a close eye on them; you want that beautiful golden brown color to shine through!
Total time
In total, you’ll need around 30 minutes from start to finish before you can indulge in these spooky treats. Perfect for a last-minute Halloween gathering or a cozy night in! Enjoy the process and remember, the best cookies come from a little bit of love and creativity. For additional tips on cookie baking, check out this helpful guide on baking times.
Now that you have the timing down, let's get to the fun part: making those adorable peanut butter spider cookies!
Nutritional Information for Peanut Butter Spider Cookies
When you're ready to indulge in Peanut Butter Spider Cookies, it helps to know what you're savoring. Here’s a quick breakdown of their nutritional value:
-
Calories: Approximately 130 calories per cookie, making them a delightful treat without too much guilt.
-
Protein: Each cookie boasts about 3 grams of protein, thanks largely to the creamy peanut butter, contributing to your daily intake.
-
Sodium: With around 90 mg of sodium per cookie, it’s a moderate option for those monitoring their salt consumption.
For those balancing their indulgence with mindful eating, Peanut Butter Spider Cookies can be enjoyed in moderation. Want to dive deeper into nutrition? Check out Healthline for more tips!
FAQs about Peanut Butter Spider Cookies
Can I use natural peanut butter?
Yes, you can! However, keep in mind that natural peanut butter can have a different consistency and might alter the texture of your peanut butter spider cookies. Opt for a creamy variety to ensure the best results. If you prefer a sweeter taste, you might want to add a bit more sugar since natural peanut butter tends to be less sweet than the processed kind.
How do I store leftovers?
To keep your delicious peanut butter spider cookies fresh, store them in an airtight container at room temperature. They should stay tasty for about four to five days. If you want to enjoy them even longer, you can freeze them! Just be sure to separate layers with parchment paper before sealing them in a freezer-safe bag to prevent sticking.
How can I make these cookies more festive?
Get creative with toppings! For a Halloween twist, consider adding candy corn or edible glitter to the mix. You can also play with the chocolate drizzle for spider legs by mixing in colors like orange or red. A little creativity will elevate your peanut butter spider cookies into a true festive delight!
Conclusion on Peanut Butter Spider Cookies
These peanut butter spider cookies are a delightful treat that combines creativity and flavor perfectly. With their chewy texture and charming spider design, they’re not just cookies; they’re a fun, festive way to celebrate any occasion. Whether for Halloween or simply to indulge, these cookies are a must-try!
Why these cookies are a must-try!
-
Unique Presentation: The adorable spider design captivates both kids and adults alike—perfect for celebrations or casual snacking.
-
Delicious Flavor Combination: The rich peanut butter harmoniously pairs with chocolate, creating a mouthwatering experience with every bite.
-
Easy to Make: Simple ingredients and straightforward steps make these cookies accessible even for novice bakers.
-
Engaging Activity: Decorating the cookies adds an interactive element, making it a fantastic group activity or family project.
Try these peanut butter spider cookies for your next gathering, and let the compliments roll in! If you’re interested in more fun Halloween-themed recipes, don’t forget to check out resources like Food Network’s Halloween Recipes to expand your festive baking repertoire.
Peanut Butter Spider Cookies: Easy Treats for Family Fun
Equipment
- oven
- mixing bowls
- baking sheets
- Piping Bag
- microwave
Ingredients
Dry Ingredients
- 1.5 cups all-purpose flour
- 0.5 teaspoon baking soda
- 0.5 teaspoon baking powder
Wet Ingredients
- 0.5 cup salted butter softened
- 0.5 cup granulated sugar
- 0.5 cup brown sugar
- 1 piece egg
- 0.5 cup creamy peanut butter not natural
- 1 teaspoon vanilla
Spider Decorations
- 44 pieces whoppers 22 large and 22 small
- 1 cup semi-sweet chocolate chips (6 ounces)
- 1 small tube white cake decorating gel
- 0.25 cup granulated sugar for rolling
Instructions
Cookie Preparation
- Preheat Oven to 375°. Line 2 baking sheets with parchment paper and set aside.
- In a medium bowl, mix together baking powder, baking soda and flour and set aside.
- In a separate bowl, cream butter. Add sugars and peanut butter and mix until well combined. Add the egg and vanilla and mix until incorporated.
- Add the dry ingredients to the wet and mix until fully combined.
- Using a 2 tablespoon scoop, scoop out batter and roll into balls. Roll them in sugar and then place them on the prepared baking sheet. Bake for 8 -10 minutes.
- While the cookies are in the oven, open your package of malted milk balls and make a pile of 22 large and 22 small whoppers. The large ones will be the bodies of the spiders and the small ones will be the heads.
- Remove cookies from the oven and immediately press the malted milk balls into the tops of cookies, one next to the other. Let the cookies cool in the fridge for a few minutes until cool to the touch.
- In the meantime, pour chocolate chips in a microwave safe bowl and heat in 30 second increments until melted, stirring in between each time. Once it starts to look melty, heat in 15 second increments, stirring in between. Do not overcook. Remove from microwave and allow it to cool for a couple minutes.
- Pour into a piping bag and use to make the spider legs.
- Add little dots with the white cake decorating gel for the eyes and add a little black nonpareil sprinkle to the middle of each one.
- Cool completely before serving.

Leave a Reply