
Introduction to Rosemary and Roasted Garlic Artisan Bread
Why homemade bread is a game changer for young professionals
As a young professional juggling work, social life, and maybe a hobby or two, cooking may sometimes feel like a daunting task. However, making your own rosemary and roasted garlic artisan bread can be a refreshing game changer. Not only is it surprisingly simple, but it also allows you to control the ingredients, making it a healthier option compared to store-bought varieties. Plus, there's just something magical about filling your kitchen with the warm aroma of baking bread that instantly elevates your mood and impresses any guests!
The allure of rosemary and roasted garlic in bread-making
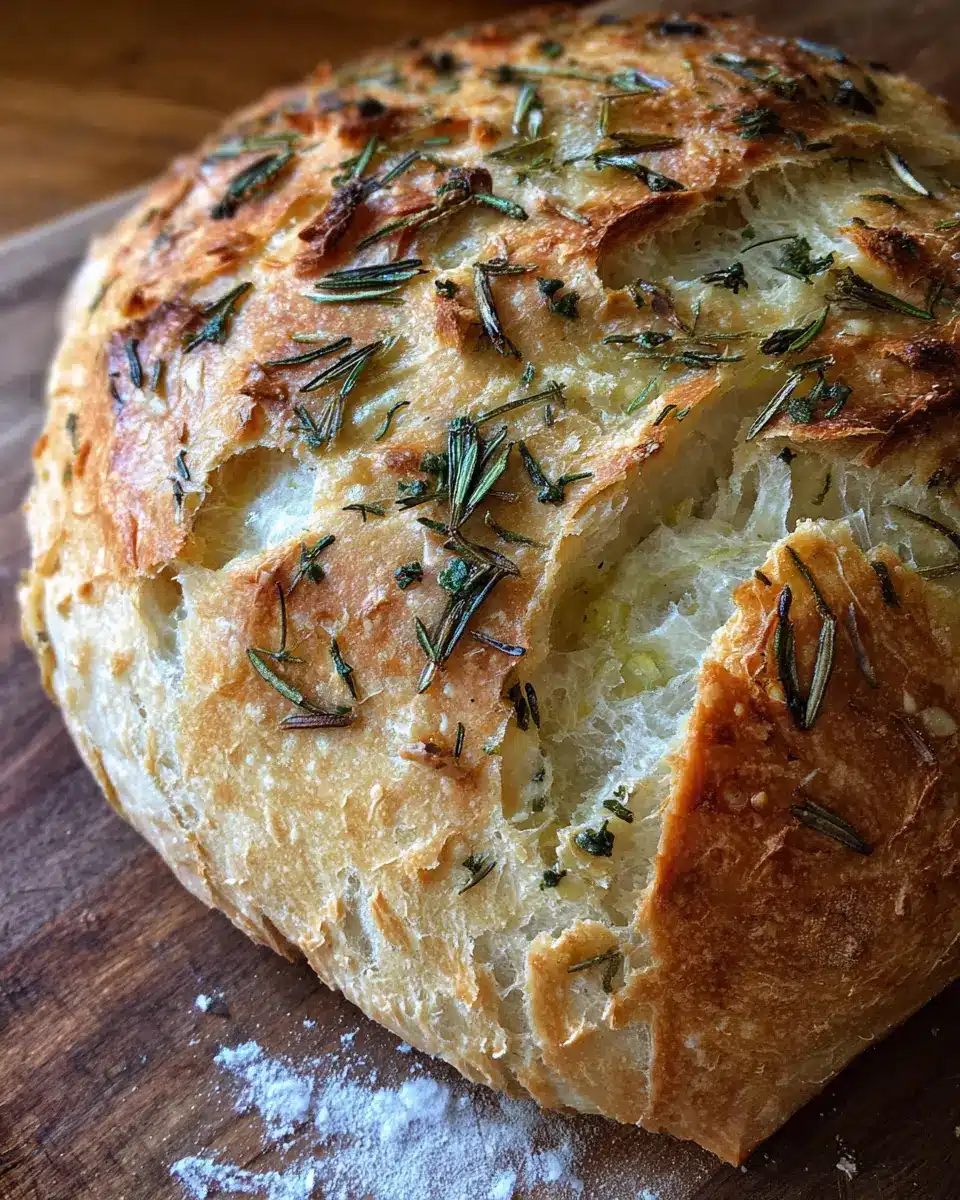
Imagine pulling a loaf of perfectly crusty bread from the oven, infused with the fragrant notes of fresh rosemary and the sweet, mellow flavor of roasted garlic. These ingredients provide not just a flavor boost but also offer numerous health benefits. Rosemary is packed with antioxidants, while garlic has long been praised for its immune-boosting properties.
You can learn more about the advantages of fresh herbs in cooking from sources like the American Culinary Federation. They suggest that using fresh ingredients can enhance the taste and nutritional value of your meals. So when you combine the rich flavors of rosemary and roasted garlic in your homemade artisan bread, you’re not just creating a delicious treat; you’re also treating your body well.
Get ready to dive into this easy and satisfying process—you'll be glad you did!
Ingredients for Rosemary and Roasted Garlic Artisan Bread
Roasted Garlic Essentials
Roasting garlic can transform this simple ingredient into a sweet, caramelized delight that infuses your rosemary and roasted garlic artisan bread with rich flavor. To prepare it, you’ll need just one head of garlic, a dash of extra-virgin olive oil, and a sprinkle of coarse sea salt and freshly ground black pepper. The process is straightforward: drizzle the garlic with oil, season it well, wrap it in foil, and roast it until it’s soft and aromatic. This step not only elevates the taste but also fills your kitchen with an irresistible aroma.
Bread Ingredients Breakdown
For the base of your rosemary and roasted garlic artisan bread, gather the following ingredients:
- 1½ cups room temperature water (ideal at around 70°F/21°C)
- 1 teaspoon active dry yeast
- 3 cups bread or all-purpose flour, plus extra for dusting
- ½ teaspoon dried oregano
- 1 teaspoon kosher or fine sea salt
- 2 teaspoons finely chopped rosemary (plus more for a decorative sprinkle)
- 1 head of smashed roasted garlic
- 1 tablespoon extra-virgin olive oil
This combination of ingredients not only yields a beautiful loaf but also integrates flavors that complement each other wonderfully.
Importance of Quality Ingredients
When it comes to baking, the quality of your ingredients can make all the difference. Using high-quality olive oil, fresh herbs, and good flour can elevate your rosemary and roasted garlic artisan bread from ordinary to extraordinary. Consider sourcing local or organic products where possible, as these often provide a superior taste and nutritional value. For instance, fresh rosemary not only enhances flavor but brings a delightful fragrance that makes your home feel warm and inviting. Always remember, great baking begins with great ingredients!
Preparing Rosemary and Roasted Garlic Artisan Bread
Baking rosemary and roasted garlic artisan bread is a delightful experience that fills your kitchen with wonderful aromas. Follow these simple steps for a loaf that’s bursting with flavor and has that perfect crust you crave.
Roasting the Garlic
Start by preparing the garlic. Slice a head of garlic in half, exposing the cloves, and drizzle them with extra-virgin olive oil. Don’t forget to season with coarse sea salt and freshly ground black pepper. Wrap it in foil and roast on a baking sheet at 400°F (204°C) for about 40 minutes. Once it's cooled, squeeze the cloves out of their skins and set them aside. This roasted garlic will lend a rich flavor to your bread that’s simply irresistible.
Activating the Yeast
Next, it’s time to activate the yeast. Pour 1½ cups of room-temperature water into a bowl and sprinkle 1 teaspoon of active dry yeast over it. Let this mixture sit for about 10-15 minutes, until it becomes frothy. This step ensures your yeast is alive and ready to help your dough rise beautifully.
Mixing the Dry Ingredients
In a separate large bowl, mix your dry ingredients. Combine 3 cups of bread or all-purpose flour, ½ teaspoon of dried oregano, 1 teaspoon of kosher or fine sea salt, and 2 teaspoons of finely chopped rosemary. This blend will bring depth and aroma to your artisan bread.
Combining and Kneading the Dough
Now comes the fun part! Add the yeast mixture, roasted garlic, and 1 tablespoon of olive oil to your dry ingredients. Use a rubber spatula to mix until combined. The dough will look sticky and stringy; don’t worry, that’s perfect! If it’s too wet, add a little more flour, but it’s better to err on the side of a stickier dough.
Allowing the Dough to Rise
Cover the bowl with a clean kitchen towel and let the dough rise in a warm place until it doubles in size, which can take anywhere from 8 to 10 hours. The ideal ambient temperature is around 70°F (21°C). If you’re short on time, you can let it rise for as little as 2-3 hours or refrigerate it overnight for a more developed flavor.
Shaping and Preparing for Baking
After the dough has risen, it’s time to shape it. Lightly flour your countertop and gently pull the dough out using floured hands. Fold it into a ball, seam side up, and place it into a floured bowl. Cover and refrigerate it for at least an hour or up to 48 hours if you wish to plan ahead.
Baking to Perfection
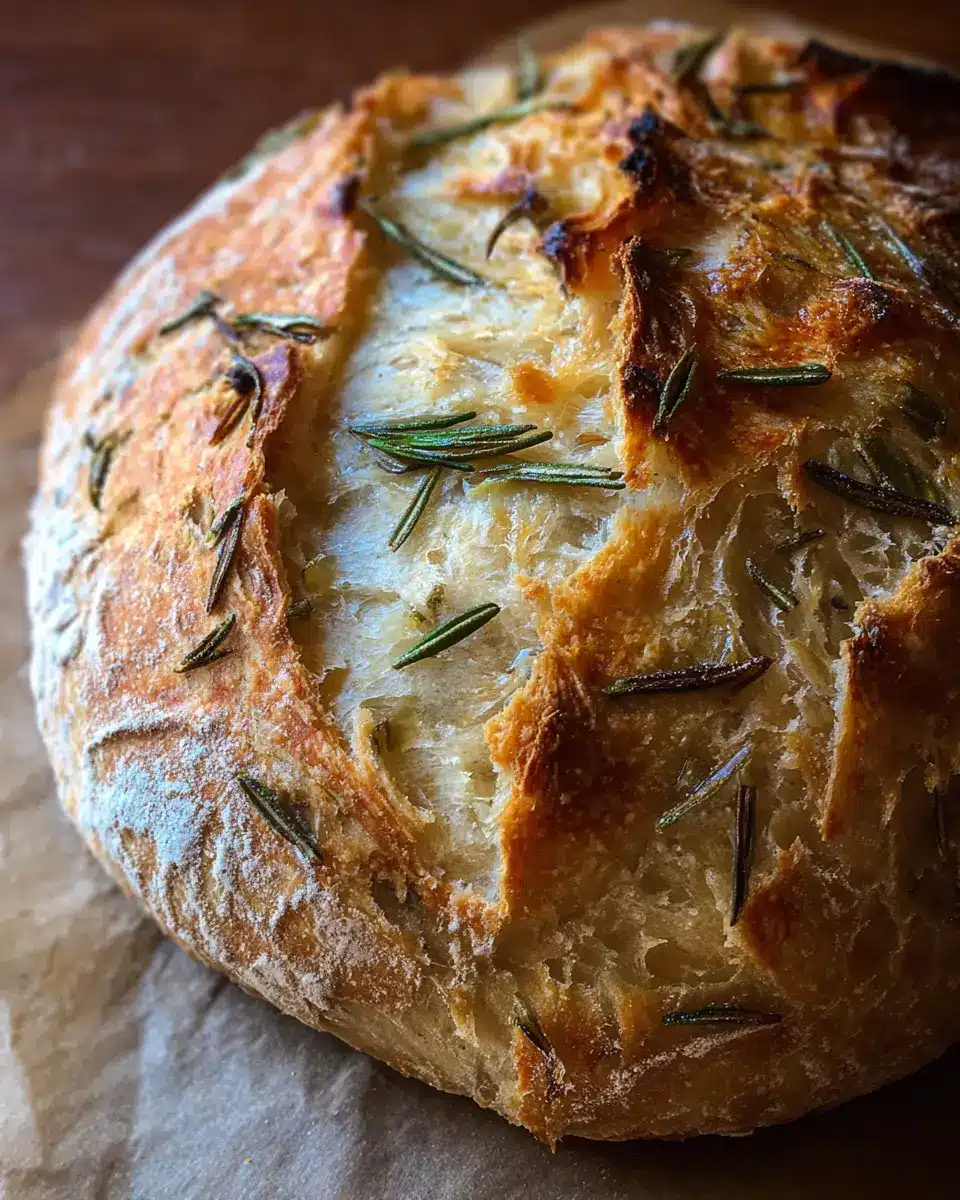
When you're finally ready to bake, preheat your oven to 450°F (232°C) with a Dutch oven inside. Carefully turn the dough out onto a floured surface, shape it gently, and score the top with a razor blade. This scoring allows steam to escape, ensuring a perfectly crusty loaf. Transfer the dough onto parchment paper and bake in the preheated Dutch oven for about 30 minutes with the lid on, followed by 15 minutes uncovered. When it's golden-brown and sounds hollow when tapped, it's done!
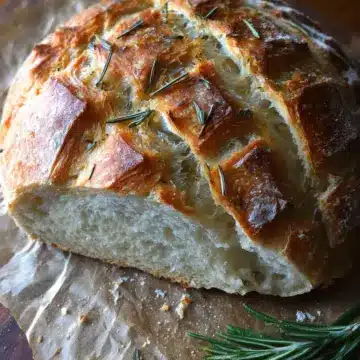
Allow your rosemary and roasted garlic artisan bread to cool on a wire rack for an hour before slicing. The wait will be worth it—a warm, aromatic loaf ready to complement your meals! Enjoy!
Variations on Rosemary and Roasted Garlic Artisan Bread
Adding cheese for a savory twist
Elevate your rosemary and roasted garlic artisan bread by melting in your favorite cheese. Options like Parmesan, Mozzarella, or even a sharp Cheddar can add a delightful richness. Simply fold in shredded cheese during the mixing stage for a gooey, cheesy finish that pairs perfectly with soups or salads.
Incorporating sun-dried tomatoes for a Mediterranean flair
For a burst of Mediterranean flavor, consider adding chopped sun-dried tomatoes to your dough. These tangy morsels bring a vibrant color and a subtle sweetness that beautifully complement the garlic and rosemary. Just mix them in while combining dry ingredients, and enjoy an aromatic twist in every slice.
Infusing herbs for added flavor complexity
Experiment with additional herbs like thyme, basil, or oregano to enhance the complexity of your bread's flavor profile. A tablespoon of mixed dried herbs or a handful of fresh herbs can transform your loaf into a distinctive artisan creation. Each bite will be a delicious journey, making this bread not just a side, but a star!
With these delightful variations, your rosemary and roasted garlic artisan bread can be as versatile as your culinary imagination allows.
Baking notes for Rosemary and Roasted Garlic Artisan Bread
Tips for managing rise times
Getting the rise just right for your rosemary and roasted garlic artisan bread can be the difference between a good loaf and a great one. Aim for a warm, draft-free area, preferably around 70°F. If your kitchen is on the cooler side, try placing the dough in an unheated oven with the light on. This creates a cozy environment for the dough to thrive while it rises—just keep an eye on it!
How to adjust for different climates
Weather can play a big role in your bread baking. In high humidity, you may need to reduce liquid slightly, while in dry climates, you might need to add a bit more water. If you’re unsure, start by adding just enough to make a soft, slightly sticky dough. A great resource for climate-specific baking tips can be found at the King Arthur Baking Company.
Storing your bread for freshness
To keep your delicious rosemary and roasted garlic artisan bread fresh, store it at room temperature in a paper bag for the first few days. For longer storage, slice the loaf and wrap it tightly in plastic wrap before placing it in the freezer. This way, you can enjoy a perfectly toasted slice anytime without compromising on taste! Just remember to consume within three months for the best flavor.

Serving suggestions for Rosemary and Roasted Garlic Artisan Bread
Pairing with soups and salads
The Rosemary and Roasted Garlic Artisan Bread is an exquisite companion to hearty soups and crisp salads. Picture it alongside a warm, creamy tomato basil soup or a refreshing Greek salad. The aromatic flavors in the bread enhance your meal, adding a delightful touch. For an effortless lunch, consider a classic vegetable soup; simply dip your slice into the broth and absorb those vibrant flavors.
Serving as an appetizer with dips
This artisan bread also shines as an appetizer! Slice it into hearty pieces and serve with garlic-infused olive oil, a zesty balsamic reduction, or a creamy hummus. Each bite of the rosemary and roasted garlic artisan bread beautifully complements the rich and savory dips, making your gathering feel utterly gourmet.
Using for gourmet sandwiches
Elevate your sandwich game by utilizing this bread for your favorite fillings. Picture turkey bacon, fresh spinach, and a smear of aioli sandwiched between slices of your fragrant loaf. You can also try chicken ham with roasted peppers and a sprinkle of feta for a Mediterranean twist. The bread's aromatic quality adds a gourmet flair that transforms ordinary lunches into special occasions.
Time details for Rosemary and Roasted Garlic Artisan Bread
Preparation time
Get started with a quick 15 minutes of hands-on prep. You’ll roast your garlic and mix your dough to get everything ready for that irresistible aroma.
Rising time
Patience is key here! Allow your dough to rise for 8-10 hours. An overnight rise can develop even more flavor—perfect for a morning bake.
Baking time
Once your dough is ready, you’ll spend approximately 45 minutes in the kitchen baking. This includes covering and uncovering your bread to achieve that perfectly golden crust.
Total time
From start to finish, you’re looking at about 9-11 hours. Most of this time is passive, so you can squeeze in other activities while you wait for your delicious rosemary and roasted garlic artisan bread to come to life!
For more detailed instructions and tips, check out the full recipe linked above. You won’t regret embarking on this aromatic adventure!
Nutritional Information for Rosemary and Roasted Garlic Artisan Bread
Calories
A generous serving of rosemary and roasted garlic artisan bread contains approximately 180 calories. This makes it a delightful addition to any meal without overindulging.
Protein
Each slice provides about 6 grams of protein, offering a satisfying boost that pairs nicely with your favorite spreads or toppings.
Sodium
With around 300 mg of sodium per slice, this artisan bread remains moderate in saltiness, making it a flavorful yet health-conscious choice for your diet.
Want to learn more about nutritional labels? Check out Eatright.org for detailed guidelines!
FAQs about Rosemary and Roasted Garlic Artisan Bread
What if my dough doesn’t rise?
If your dough for the rosemary and roasted garlic artisan bread isn’t rising, it could be due to a few factors. First, ensure your yeast is fresh and properly activated by mixing it with warm water. If the water is too hot or too cold, it may affect yeast activation. If you’re finding your dough hasn’t risen enough, try moving it to a warmer area, avoiding drafts, which could slow the process. Sometimes, patience is key—give it a little more time, and check it again!
Can I freeze the bread?
Absolutely! This rosemary and roasted garlic artisan bread is freezer-friendly. Once the bread has cooled completely, wrap it tightly in plastic wrap and place it in a freezer-safe bag. You can enjoy freshly thawed slices for up to three months. When you’re ready to indulge, just let it thaw at room temperature, or pop a slice in the toaster for a crispy treat.
How can I make the bread gluten-free?
To create a gluten-free version of the rosemary and roasted garlic artisan bread, substitute traditional flour with a gluten-free all-purpose flour blend. Make sure it contains xanthan gum, which helps mimic the elasticity in the dough. Follow the same preparation steps, but be aware that gluten-free dough may require slight alterations in hydration. Enjoy experimenting!
Conclusion on Rosemary and Roasted Garlic Artisan Bread
Recap the benefits of homemade bread
There's something magical about creating your own homemade bread. Not only do you control the ingredients, ensuring freshness and flavor, but the act of baking can also be a delightful stress-reliever. Plus, nothing beats the aroma of rosemary and roasted garlic artisan bread wafting through your home.
Encouragement to try the recipe and make it personal
So why not give this recipe a go? Experiment with different herbs or even add in cheese for a fun twist! Share it with friends or keep it all to yourself; there’s no wrong way to enjoy your creation. Happy baking, and don't forget to savor every bite!
Rosemary and Roasted Garlic Artisan Bread
Equipment
- oven
- Dutch oven
- Baking Sheet
- mixing bowl
- spatula
- Wire cooling rack
Ingredients
Roasted Garlic
- 1 head Garlic
- to taste tablespoon Extra-virgin olive oil
- to taste Coarse sea salt
- to taste Freshly ground black pepper
Bread
- 1.5 cups Water Room temperature (at or near 70°F/21°C)
- 1 teaspoon Active dry yeast
- 3 cups Bread or all-purpose flour Plus more for dusting
- 0.5 teaspoon Dried oregano
- 1 teaspoon Kosher or fine sea salt
- 2 teaspoons Finely chopped rosemary Plus more to sprinkle across the top
- 1 whole head Roasted garlic Smashed
- 1 tablespoon Extra-virgin olive oil
Instructions
Preparation
- Slice the garlic head in half. Drizzle the exposed cloves with olive oil and season with salt and pepper. Wrap in foil and roast on a baking sheet at 400ºF (204ºC) for 40 minutes. Let cool, remove cloves from their skins and set aside.
- When you're ready to bake, sprinkle the yeast over the water and let it sit for 10-15 minutes. In a large bowl, stir together flour, oregano, salt and rosemary and set aside.
- Add yeast mixture, roasted garlic and olive oil to the bowl then use a rubber spatula to mix it together just until combined. The dough will look a little sticky and stringy and there should still be a little flour around the edges of the bowl.
- Cover and let rise somewhere warm until it has doubled in size, about 8-10 hours.
- Once the dough has doubled in volume, use your hands to pull the dough out onto a floured surface. With floured hands, gently fold the dough into itself several times until a soft, flour-covered ball is formed. Seam side up, lift and place it into a flour dusted bowl. Dust with flour, cover and refrigerate overnight.
- Preheat oven to 450ºF (232ºC) with your Dutch oven inside the oven.
- Uncover then invert the bowl to turn the dough out onto a lightly floured surface seam side down. If needed, gently turn it with your hands and nudge it into the shape of a loaf. Place it on a sheet of parchment paper and score the top with a razor blade or the tip of a sharp knife with a design of your choosing.
- Once the oven is preheated, remove the Dutch oven from the oven and transfer the dough, still on the parchment, into the Dutch oven. Cover and bake for 30 minutes, then remove the cover and bake for 15 minutes more.
- Using parchment edges, lift the bread from Dutch oven and transfer it to a wire cooling rack to let cool for up to an hour before slicing.


Leave a Reply