
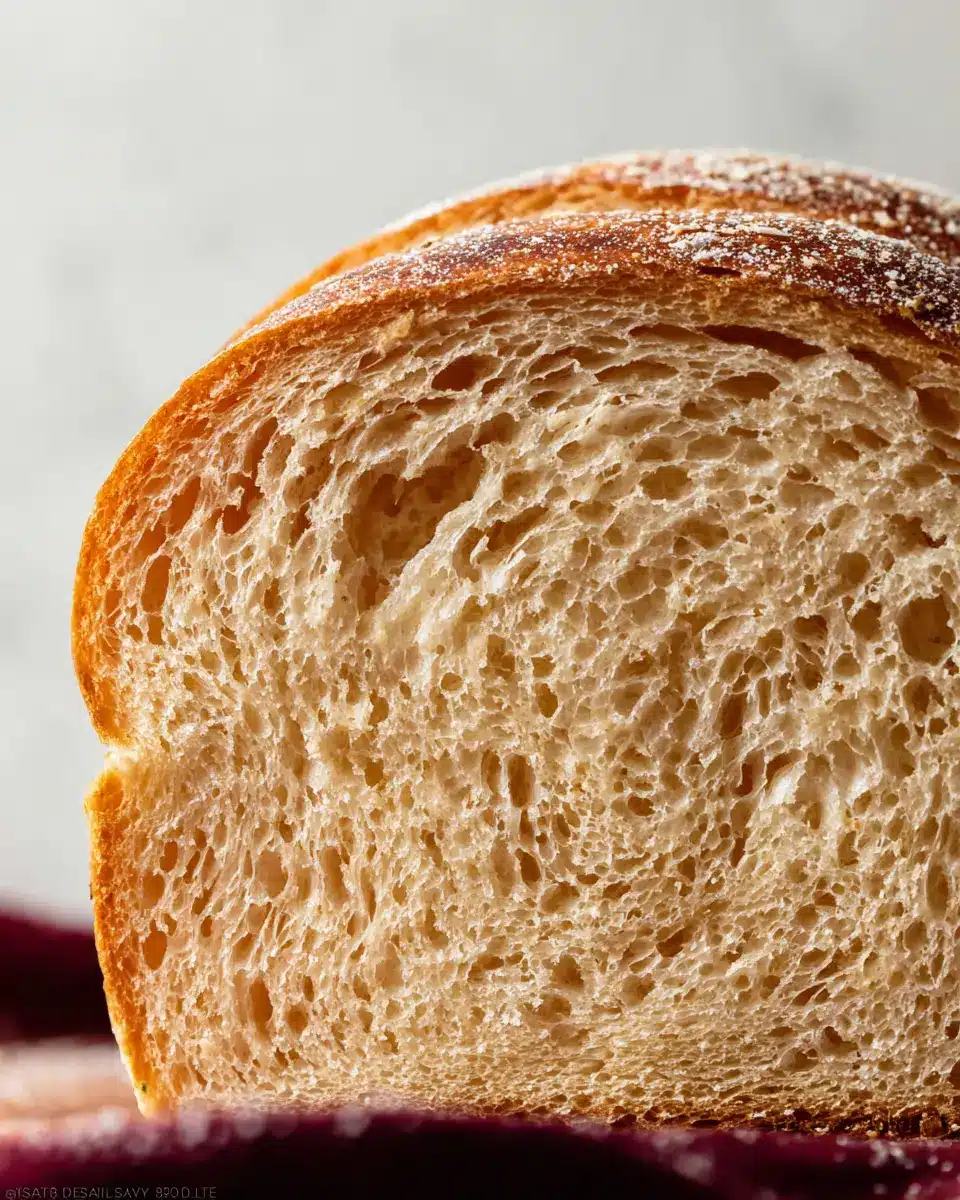
Introduction to Simply Sandwich Bread
Homemade bread is not just a delicious treat – it’s a rewarding experience that nurtures both your culinary skills and your taste buds. When you bake simply sandwich bread from scratch, you have complete control over the ingredients, ensuring freshness and flavor that store-bought options often lack. Plus, there’s something incredibly satisfying about pulling a golden loaf out of the oven, its warm aroma filling your kitchen.
Think about it: ready-made bread may promise convenience, but it rarely matches the taste and quality of homemade. Did you know that many store-bought breads contain preservatives? Not to mention, cooking at home can save you money while also being a fun and therapeutic way to unwind after a long day. For those who love the smell of freshly baked goods wafting through their homes, creating your own bread is a fantastic way to bring both warmth and comfort to your kitchen.
So, why not treat yourself? Get ready to impress your friends and family with a loaf that’s not only easy to make but can also enhance any meal, from savory sandwiches to delightful toast. With this simply sandwich bread recipe, you’ll be well on your way to becoming the bread-baking star of your household!
Ingredients for Simply Sandwich Bread
Essential ingredients you'll need
Baking your own simply sandwich bread is an incredibly rewarding experience, and it all starts with some simple, high-quality ingredients:
- Water: 1 cup, warmed to 110°F (43°C) – This activates the yeast effectively.
- Whole Milk: ¼ cup, also warmed – Adds richness to the bread.
- Instant Yeast: 2 and ¼ teaspoons (1 packet), such as Platinum Yeast by Red Star – This is the magic leavener for a fluffy loaf.
- Granulated Sugar: 2 tablespoons to feed the yeast.
- Unsalted Butter: 4 tablespoons, softened – It contributes to a tender texture.
- Salt: 1 and ½ teaspoons – Enhances flavor and balances sweetness.
- All-Purpose or Bread Flour: 3 and ⅓ cups (about 420–430g), plus extra as needed – Choose bread flour for a chewier bread.
Optional ingredients for customization
You can easily personalize your simply sandwich bread with these optional add-ins:
- Herbs & Spices: Add a teaspoon of dried rosemary or garlic powder for an aromatic twist.
- Seeds: Sprinkle poppy or sesame seeds for added texture on top.
- Whole Wheat Flour: Swap in some whole wheat flour for a heartier loaf, though it will change the texture.
For more tips on customizing your baking experience, check out this guide. Happy baking!
Step-by-step preparation for Simply Sandwich Bread
Baking simply sandwich bread at home is a rewarding experience. Whether you're crafting delicious turkey bacon sandwiches or enjoying a slice with your morning coffee, this bread is sure to impress! Let’s walk through the steps together.
Prepare the dough mixture
Start by whisking together warm water, warm milk, and yeast in the bowl of your stand mixer. It's essential to use liquids at about 110°F to activate the yeast properly. When the yeast bubbles up (which should take about 5 minutes), you’re ready to add in sugar, softened butter, and salt. Gradually incorporate flour—begin with one cup, and build from there. If you don’t have a mixer, no problem! A sturdy wooden spoon will work just fine; just roll up your sleeves and get mixing!
Knead the dough until smooth
Once you've added the rest of the flour, it’s time to knead the dough. If you're using a mixer, let it do the work for about 5–8 minutes. Alternatively, knead it on a lightly floured surface by hand. The dough should be soft yet slightly tacky—if it’s too sticky, sprinkle in 1 teaspoon of flour at a time as needed. You can perform the “windowpane test” by stretching a piece of dough; if it doesn’t tear and allows light through, you're good to go!
First rise – let it do its magic
Grease a large bowl with olive oil or nonstick spray. Place the dough inside, turning it to coat all sides with oil. Cover the bowl and let the dough rise in a warm spot for about 1–2 hours, or until it has doubled in size. This part always fascinates me—watching the dough grow is like magic!
Shape the dough for the loaf
After the first rise, gently punch the dough to release air. Lightly flour your work surface and roll it out into a rectangle, approximately 8×15 inches. Then, roll it into an 8-inch log. Don't worry about perfect edges; this isn’t a beauty competition, but your taste buds will surely thank you!
Second rise – the final stretch
Transfer the shaped loaf into a greased 9x5-inch loaf pan, and cover it with aluminum foil or a towel. Let it rise again for about an hour or until it crowns about an inch above the pan. This final rise is crucial for achieving that fluffy texture we all love.
Preheat the oven and prepare for baking
While the loaf is rising, preheat your oven to 350°F. It’s best to ensure that the baking is at the bottom rack to avoid burning the top. A little tip: if your kitchen is chilly, the dough might take longer to rise.
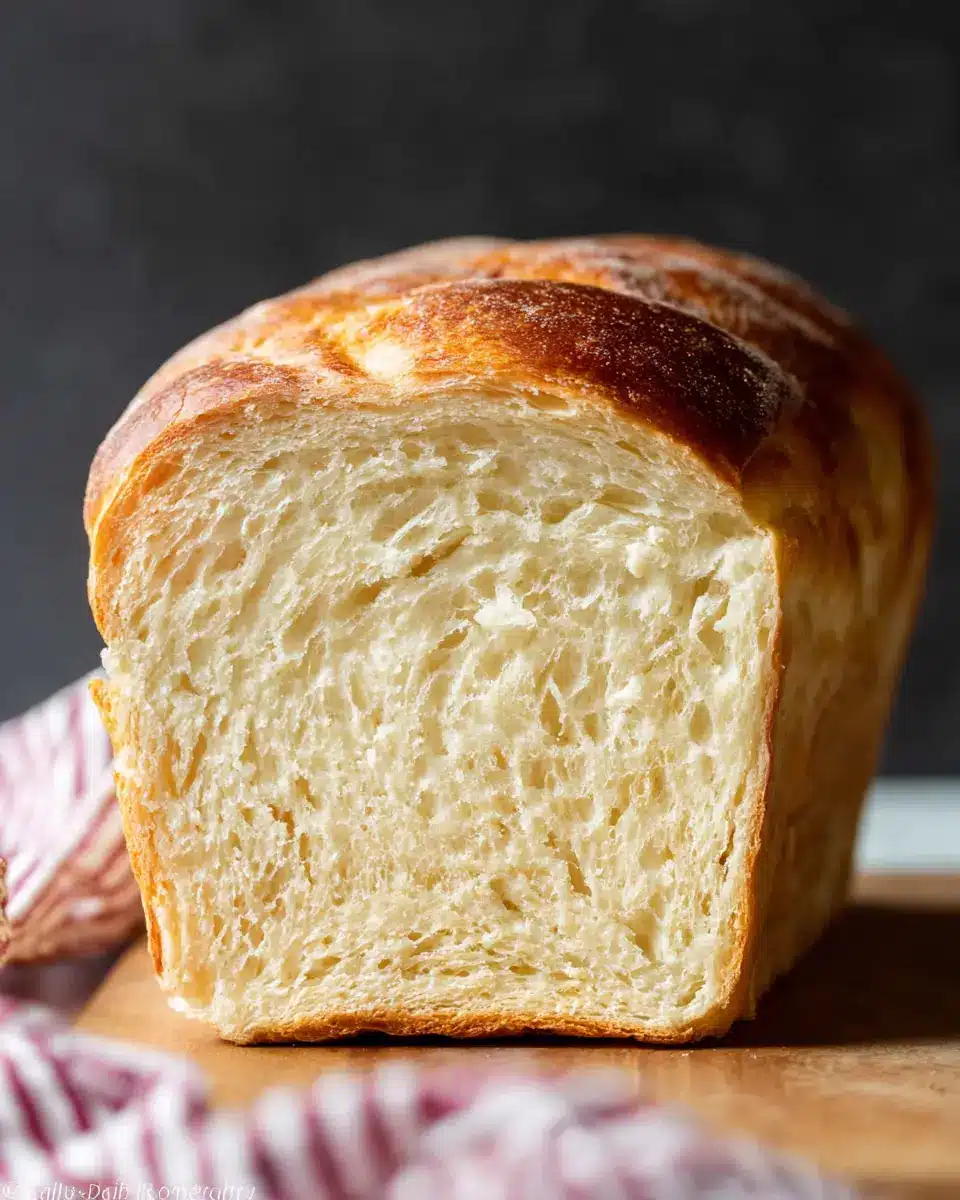
Bake to golden perfection
Once the oven is preheated, bake your wonderful simply sandwich bread for 32-36 minutes. The top should turn a beautiful golden brown. A hollow sound when tapped indicates it’s ready, and an instant-read thermometer should read 195–200°F.
Let it cool for a few minutes in the pan before you slice it. Enjoy, and don’t forget to share your delicious creations with friends! For more insights on bread baking, you might enjoy resources such as the King Arthur Baking Company for expert tips and tricks. Happy baking!

Variations on Simply Sandwich Bread
Creating your own simply sandwich bread opens the door to delightful variations that can elevate your sandwiches from ordinary to extraordinary. Let's explore two delicious twists!
Whole Wheat Sandwich Bread Options
If you prefer a heartier texture and added nutrition, consider substituting part or all of the all-purpose flour with whole wheat flour. Not only does this add flavor, but it also boosts fiber content, making your sandwiches a wholesome choice. For a fantastic recipe, check out this whole wheat bread guide.
Herb-Infused Sandwich Bread Variations
Want to spice things up? Add fresh or dried herbs like rosemary, thyme, or basil to your simply sandwich bread dough. Just incorporate about 2 tablespoons of your chosen herb during the mixing process for a fragrant twist that complements everything from turkey bacon to chicken ham. These subtle flavors can make a simple lunch feel gourmet!
Experiment with these variations and make each loaf uniquely yours!
Cooking tips and notes for Simply Sandwich Bread
Common mistakes to avoid
Creating the perfect simply sandwich bread can be rewarding, but common mistakes can trip you up. Be sure to measure your flour correctly; using too much can lead to a dry loaf. Don't skimp on kneading—this helps develop gluten for a better texture. Also, ensure your yeast is fresh, as expired yeast can impede the rising process. Lastly, keep an eye on your dough’s rising time; rushing it may result in a dense loaf.
Recommended tools for success
Having the right tools makes all the difference when baking simply sandwich bread. A quality stand mixer with a dough hook saves time and effort. If you’re mixing by hand, a good wooden spoon or silicone spatula is essential. A 9×5-inch loaf pan is ideal for shaping your bread, while a reliable kitchen thermometer ensures you bake it perfectly. For more tips, check out my guide on baking with yeast here.
Serving suggestions for Simply Sandwich Bread
Ideal pairings for your sandwich creations
Your simply sandwich bread is the perfect canvas for all sorts of delicious fillings! Whether you're prepping lunch for the week or throwing together a quick bite, consider these tasty combinations:
- Turkey Bacon & Avocado: Layer crispy Turkey Bacon with sliced avocado, lettuce, and a touch of mayo for a satisfying crunch.
- Chicken Ham & Cheese: Add slices of Chicken Ham and your favorite cheese, then grill it into a toasty delight.
- Veggie Delight: Fill with hummus, crunchy cucumbers, fresh spinach, and roasted red peppers for a vegetarian twist.
- Peanut Butter & Banana: For a sweet treat, spread peanut butter and top with banana slices for a quick energy boost.
Creative ways to enjoy leftover bread
No need to let your simply sandwich bread go stale! Here are a few creative ideas to make the most out of any leftovers:
- Bread Pudding: Transform stale slices into a comforting bread pudding. Just mix with eggs, milk, sugar, and your favorite spices.
- Croutons: Dice leftover bread into cubes, toss with olive oil and herbs, and bake until crispy. Perfect for salads or soups.
- French Toast: Soak slices in an egg mixture, then cook for a delicious brunch option that everyone will love.
- Bruschetta: Top toasted slices with diced tomatoes, basil, and a drizzle of balsamic vinegar for a fresh appetizer.
With these simple suggestions, you’ll never have a dull moment with your simply sandwich bread!
Time Breakdown for Simply Sandwich Bread
When you decide to make simply sandwich bread, understanding the time commitment can help you plan your day effectively. Here’s what you can expect for each step:
Preparation Time
The preparation takes about 15 minutes. This includes gathering your ingredients and mixing the dough. It’s a straightforward process—mix, knead, and you’re on your way to homemade bread!
Rising Time
The dough will need 1-2 hours to rise. During this time, it will double in size, thanks to the yeast working its magic. For the best results, let it rise in a warm place. If you are interested in getting a little faster rise, check out my Baking with Yeast Guide.
Baking Time
Finally, the baking time is around 32-36 minutes. Your kitchen will be filled with a delightful aroma as it bakes to a golden brown. For a perfectly baked loaf, use an instant-read thermometer—look for an internal temperature of 195–200°F (90–93°C).
In total, you’re looking at about 2-3 hours from start to finish, including rising and baking time. So, consider popping your favorite series on Netflix while you wait for that wonderful bread to bake!
Nutritional Facts for Simply Sandwich Bread
Calories per slice
Enjoying a slice of Simply Sandwich Bread means indulging without guilt. Each slice contains about 120 calories, making it a light choice for your meals.
Protein content
With approximately 4 grams of protein per slice, this bread provides a good foundation for your daily protein intake, especially when paired with ingredients like turkey bacon or chicken ham.
Required daily values
One slice contributes to your daily nutritional requirements, giving you around 6% of the daily recommended protein for a 2,000-calorie diet. This makes it a wholesome option as you build delicious sandwiches! For more about balancing your meals, check out the USDA's Dietary Guidelines.
FAQ about Simply Sandwich Bread
Can I use different types of flour?
Absolutely! While this Simply Sandwich Bread recipe calls for all-purpose flour for a soft texture, you can also opt for bread flour for a chewier result. Just avoid using whole wheat flour, as it behaves differently; if you're looking for that flavor, check out a recipe specifically tailored for it.
How should I store my homemade bread?
To keep your Simply Sandwich Bread fresh, store it at room temperature in an airtight container for up to 6 days. If you find you can't finish it that quickly, it can be refrigerated for up to 10 days, or frozen for longer storage. Just make sure it’s tightly wrapped to preserve its deliciousness!
What if my bread doesn’t rise?
Don't panic! If your Simply Sandwich Bread doesn’t rise, it could be due to expired yeast or a cold environment. Make sure the water and milk are at the right temperature (110°F or 43°C) to activate the yeast. For a cozy rising spot, try placing the dough in a warm area, like a sunny corner of your kitchen.
Conclusion on Simply Sandwich Bread
Making simply sandwich bread at home is not only fulfilling but also enhances your meals! This tangy, soft loaf pairs wonderfully with various fillings, from creamy spreads to hearty proteins like turkey bacon or chicken ham. You'll appreciate the delightful aroma while baking, making it the perfect addition to your kitchen repertoire.
Why You’ll Love This Recipe
The magic of baking simply sandwich bread lies in its adaptability. Want something sweeter? Add a drizzle of honey or your favorite spices. Prefer a savory twist? Consider incorporating herbs or cheese into the dough!
Additionally, you might enjoy exploring more ways to utilize your homemade bread, such as:
- Toast: Perfect for breakfast, topped with avocado or a classic spread.
- Croutons: Easily transform stale bread into crispy additions for salads.
- Sandwiches: Create gourmet sandwiches with fresh ingredients and fun combinations.
Tips for Perfecting Your Bread
- Use Quality Ingredients: Choosing high-quality flour and fresh yeast can dramatically improve your results.
- Kneading: Don't rush this step; it's essential for gluten development. A good knead will produce that essential airy texture.
- Store Properly: Keep your bread in an airtight container to maintain its freshness for as long as possible.
Final Thoughts
So why not give this simply sandwich bread recipe a try? It’s a rewarding project that can easily become a staple in your weekly dinner rotation. With a little patience and love, you’ll find yourself making something uniquely delightful that brings the whole family together. For more delicious bread recipes, check out BBC Good Food for inspiration!
Simply Sandwich Bread
Equipment
- stand mixer
- loaf pan
- Rolling Pin
Ingredients
Liquid Ingredients
- 1 cup water warmed to about 110°F (43°C)
- ¼ cup whole milk warmed to about 110°F (43°C)
- 2 and ¼ teaspoons instant yeast Platinum Yeast from Red Star
Dry Ingredients
- 2 Tablespoons granulated sugar
- 4 Tablespoons unsalted butter softened to room temperature
- 1 and ½ teaspoons salt
- 3 and ⅓ cups all-purpose flour or bread flour, spooned & leveled
Instructions
Dough Preparation
- Whisk the warm water, warm milk, yeast, and sugar together in the bowl of your stand mixer fitted with a dough hook attachment. Cover and allow to sit for 5 minutes.
- Add the butter, salt, and 1 cup flour. Beat on low speed for 30 seconds, scrape down the sides of the bowl with a silicone spatula, then add another cup of flour. Beat on medium speed until relatively incorporated.
- Add the remaining flour and beat on medium speed until the dough comes together and pulls away from the sides of the bowl, about 2 minutes.
Kneading and Rising
- Keep the dough in the mixer and beat for an additional 5–8 full minutes.
- Lightly grease a large bowl with olive oil or nonstick spray. Place the dough in the bowl and cover to rise for 1-2 hours or until double in size.
- When the dough is ready, punch it down to release the air. Roll the dough out into a rectangle, roll it up into a log and place in the prepared loaf pan.
- Cover shaped loaf and allow to rise until it’s about 1 inch above the top of the loaf pan, about 1 hour.
Baking
- Adjust oven rack to a lower position and preheat oven to 350°F (177°C).
- Bake for 32-36 minutes or until golden brown on top. Tent with foil if it browns too quickly.
- Remove from the oven and allow bread to cool for a few minutes in the pan.


Leave a Reply